Snowflake

For the last 5 years or so, I have led a “Holiday Lights Bike Ride” in early December. It’s fun to tour around and look at lights on a bike, and the view you get on a bike is very different than in a car.

One of the houses has a large snowflake with white and blue lights. Very nice and pretty.

After four years of service, I retired the LED strips I had along my gutters. The “waterproof” strips had started shorting out and it was a pain to replace sections. I personally liked the “line of light” look, but the vast majority of people didn’t even notice that they changed color.

My first thought was to replace them with WS2812 strips, so that I could address all of them. I played around with a few designs, but didn’t solve the design problems to my satisfaction; coming up with a way to keep the strips actually waterproof while still supplying them with power (which you need every 2.5 meters) was a hard problem. So, I put that project on the back burner.

A while back, my Glowforge showed up, and that triggered a new thought about the snowflakes. Instead of doing addressable LEDs on the gutter, could I do snowflakes that hung at gutter level? And then do the gutters with some nice traditional C9 LEDs.

Here are the basic parameters that I came up with.

  • Addressable LEDs (probably WS2812s)

  • Snowflake outline in acrylic (because I can cut it on my glowforge), white so that the color spreads out, and something like 12″ across (a little small, but it’s an easy size to deal with, and larger sizes make it harder to deal with the wind storms we always get).

  • Around 50 LEDs per snowflake

  • With local 5V power supply. I’m tired of running 10 gauge cable and worrying about voltage drop, so I want something regulated and local. It will probably be a local 12v to 5v converter, though I might end up with local AC instead.
  • Microcontroller controlled. That was obvious with the ws2812 choice.

  • *Maybe* WIFI controlled. I’m thinking maybe 8 of the snowflakes, and I can do an ESP8266 across that many relatively cheaply. That would let me drive them in sync from the comfort of my office machine.

The snowflake design was pretty simple; it had to be so that I could easily light it with LEDs.

One of the truisms in these projects is that it’s always the wiring that is the most painful part. That almost killed me on the Snowman project; lots of individual wires, and each has to be cut, stripped, and soldered. Not fun.

I’m thinking about doing 8 of these, so that would be 8 * 50 (leds) * 4 (connections), or something like 800 wires and 1600 solder joints. And to compound that, you need decent sized conductors so that you don’t lose too much voltage along the way.

The way to get rid of all the point-to-point soldering is to use a PC board. Since boards are priced based on their area, I explored using APA102 LEDs which are available in a 2020 package.

That’s 2mm x 2mm, or just a little bit more than 1/16” square. I’m planning on soldering with a heat gun (or maybe I’ll pick up a cheap hot air rework station), but the 2020s will be blown right off the board.

So, it was back to the 5050 (5mm x 5mm) package, and at that point the WS2812B won out on cheapness. The APA102s are nicer but much pricier. Oh, and they have separate clock and data, which is one more wire to try to route correctly.

And there I ran into a problem. A run of eight 12″ x 12″ boards would be right around $200, which is a bit pricier than I had hoped, and it’s not clear to me that I could find a fab that would be able to cut such a fragile arrangement of boards; in fact, I was pretty sure I couldn’t find one.

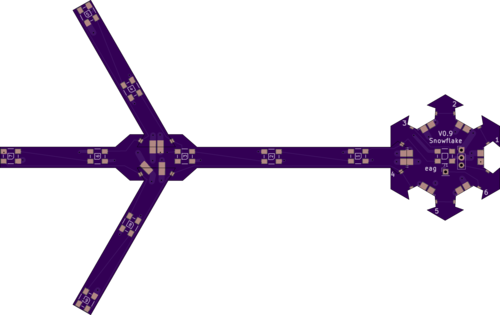
After some thought, I realized that I could do the snowflake as a series of boards; a central board, 6 straight boards that attach to the central board, and 12 arm boards that radiate from the straight boards.

After a bunch of iterations, it ended up looking like this:

image

And yes, I did notice the resemblance:

Image result for klingon warbird drawing top view

I took that design, pulled it apart, duplicated parts, and came up with this layout:

image

The PC board will be a little bigger because I’ll need tabs between each part, but it will be close. That is about 5” x 5.3” and has all the parts for a 12” snowflake.

But would it work? Well, a trip to the glowforge with a piece of cheap plexiglass and two minutes of time yielded enough pieces to test it out (the rest didn’t cut cleanly because cheap plexiglass):

image

The laser loses a bit of material in the kerf, so they are a bit loose, but that will be better with the real design, and it isn’t structural; all of this is supported by the acrylic snowflake, which is thicker and beefier.

It was time to do some board designing. Unfortunately, I don’t have a full license to Eagle, and the free version won’t let me design boards that big (actually looking at the new Autodesk free license, I probably would have been fine), so that meant I had to teach myself KiCAD. Like Eagle, it has a bunch of weird eccentricities which are of course different than the ones Eagle has, and I’ve spent a lot of time researching how to do things that are very simple.

The circuit is really very simple; just power, ground, and a daisy-chained data line. The only big constraints are:

  • I want big traces to limit the voltage drop
  • I need to be able to connect from one board to another

My usual approach for PC board design is to draw the schematic, and then just start playing around with layout. The layout of LEDs is pre-determined, so it’s really just about routing all the conductors.

Here’s a very ugly schematic:

image

I luckily forgot to save my early versions because they were pretty bad, but with a lot of refinement and rework, here’s version 0.9.

image

The fat green VCC and GND traces are on the underside of the board, and then the thin red traces (or yellow if there are green lines behind) are the data lines. Wherever there are breaks between the boards, the are solder pads that span across the boards; the idea is that those will be soldered to hold the boards together.

The hub on the right was an interesting challenge; I need to design the pads and place the pads for the other 5 arms so that they will correctly align with the one arm that I did design.

Here’s a close-up of the hub:

image

The yellow line is the board edge, so what what I have is pads that hang halfway over the board edge and out into space. You will see some small little blue dashes; those are used to align the pads properly on the cutout.

If you look at the little red data line pads, you’ll see that they aren’t so well aligned. I think I’m going to need to redesign those pads with the same alignment marks so they can be better aligned. Then I’ll have to tear out most of the data lines and the old pads, rotate each new pad to the proper angle (each one is different because of the shape of the recess), and then redo all the tracks that run to them.

Such is the nature of PC board design; you think you are done, and then you need to do a bunch of re-routing.

Luckily, the tool helps out a lot; the system knows which pins should be connected to other ones. If I get rid of some of the connections, it looks like this:

image

Each of those thin gray lines shows a connection that is made in the schematic, but is not correctly made on the board. The software also has a number of other design rules that help you find mistakes.

At this point, I upload is to OshPark, which I like for small boards, and it gave me this as a final design view:

Which looks pretty nice. 9 LEDs on each arm plus one on the hub gives me 55 LEDs per snowflake.

Given the size of the scrunched together version, I think I can get the boards for 8 full snowflakes made and delivered in 12 days for around $80, which is pretty good.

The downside of this approach is that you spend a lot of time on the pc design, but I’d rather be doing that then spending days straining my eyes and back hand-soldering.

Now the big question is, “how lucky do I feel?” Do I order a whole run at once, or do I order one and verify that it works before ordering the other 7?


Bicycle Adventures Gulf Islands Tour–August 2017

This tour starts in Victoria, but first we had to get from our house to Victoria. Transportation from Seattle to Victoria on the Clipper was included, but the 7:30 AM departure meant we had a 6:30 AM arrival time and an even earlier meeting time. Since Bicycle Adventure is headquartered a couple of miles from where we live, we headed there first and they graciously took us to Seattle to make our logistics easier.

Us == me, my wife Kim, and my daughter Samantha.

Except the early hour, the trip up was uneventful; at 30 knots, the Clipper is nice and fast and all of our luggage and our two bikes arrived in great shape. Our hotel was an easy walk from the ferry dock, and we stashed our bikes and luggage at the hotel and had a quick lunch of wraps in a nice shaded spot under the trees. We got to know our guide, Noe, and the other two cyclists on the trip, Percy (not his real name) and Grace (not her real name).

Most of the guided rides we have done have been on the larger side – 12-25 people – and have had three guides. This one was planned with two guides, but due to logistical problems (many guides head back to other jobs in September), we only had one guide. It was a little weird only having six people total, but we knew about it ahead of time, so it was fine.

That afternoon, those using the BA bikes got fitted out and we went for a short ride; just a quick out-and-back on one of Victoria’s many bike trails. This helps those who have not been on a bike recently get their legs back and for the guide to get a better idea of what the group is like.

The ride was 14.8 miles and 334′ of up; a nice warmup after a lot of sitting on the clipper.

Dinner that night was in the restaurant in the hotel – Aura.

Pork 2 ways
ash glazed loin, 18hour sous-vide belly, pommes bouchon, charred onion, cauliflower, sea buckthorn gastrique

The tenderloin was small and quite overdone and the pork belly was underseasoned. I don’t get why you would use sous-vide on pork belly; the whole point of sous-vide is not to overcook your protein and the pork belly is all fat and benefits from higher heat. I think they got the cooking methods backwards.

Not horrible for $24 Canadian, but this continues a trend that I’ve noticed; restaurants attached to hotels tend to be a bit disappointing. That, and trendy cuisine is mostly wasted on me; after a ride I’m looking for something a little more substantial.

Day 2 – The Butchart Gardens

Breakfast this morning was eggs and bacon, and then we packed up and headed out on the ride. This ride has two legs; there is a trip from Victoria to Butchart Gardens, and then a trip from the Gardens to the ferry near Sidney.

The first leg of the trip took us along the waterfront and then up the east side of Vancouver island, and was very picturesque. BA has just started using Wahoo Element Bolts for guest navigation, and that meant we mostly didn’t have to refer to paper instructions for printed maps during the week, which was nice. We stopped at a Starbucks – of course – for a break:
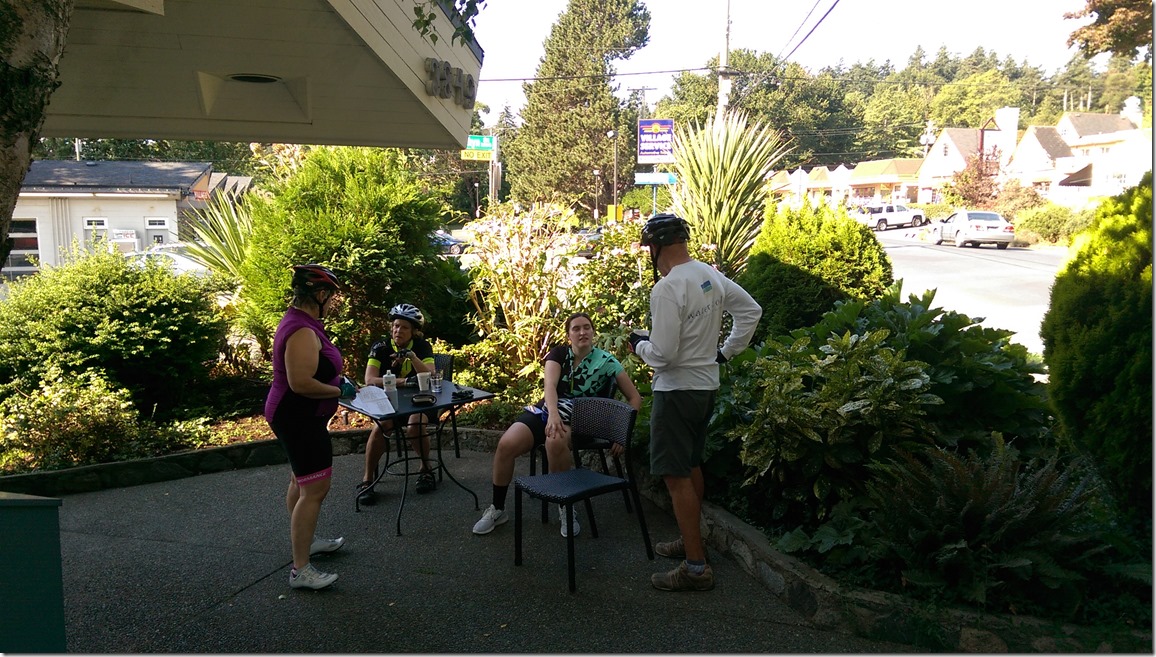
IMAG0178

At that point Percy and Grace decided to van to lunch and IIRC Samantha went with them, and Kim and I kept riding. Eventually we made it to the gardens, and although we ended up having to recruit most of the staff to find the van, find them we did.

I had visited the gardens in my youth, and remembered them as very big, but apparently we just went very slow, as Kim and I went through the majority of the areas in about 45 minutes. Many of the flowers were unnaturally large; Kim guessed excellent care and lots of fertilizer and I guessed cobalt radiation, but overall the effect is very nice. Here’s a taste of what we saw (this is the “sunken garden” section).

That clump in the middle has a little viewpoint that you can climb up into, thereby reenacting the rebel lookout scene from Return of the Jedi.

At least that’s what I told Kim it looked like when we were walking by it. Let’s compare:

As you can see, a perfect match; delta differences in foliage, the height of the lookout, and the number of X-Wing fighters.

Now I know why Kim was shaking her head.

Anyway, we headed back to the van and had a nice lunch of salad and shredded chicken in the shade under the trees. Then it was time to mount up and head towards the ferry. Samantha, Percy, and Grace chose the shorter and less hilly “direct route”, and Kim and I chose the longer and more scenic route. It was nice for the first 5 miles or so, and then Kim started getting cramps in her quads.

I have a tic-tac box of electrolyte pills that I carry that were perfect for this, but I had cleverly left them in my luggage as this was a short ride for me. Kim was fine on the flats and descents, but on the steeper ups she would walk and I would push the bikes up. This gave us a bit of anxiety because we had a ferry we needed to catch – we weren’t in danger of missing it yet but it was getting tighter. At one point I saw a “Ferry” sign, pulled out the detailed map I had, and figured out we could take the direct route to get there. Oh, and we managed to reset our Wahoos to use the direct route, quite the feat when you have old person eyesight like we do.  A quick stop at a store to get Kim some salt-laden cheetos and both of us a Coke Zero, and we made it to the ferry without incident. Only to find our ferry was late, so we grabbed dinner at Stone House Pub, a pub sited in a stone house. Hence the name. I had the Stonehouse burger with cheese, bacon, and mushrooms, and a side salad. Yum.

The ride ended up with 43 miles and 2411′ of up. Despite the cramps, Kim puts in a really nice effort for the distance and amount of up.

We catch the ferry to Galliano island, where we stay in the Galliano Oceanfront Inn and Spa. It was a nicely updated but kind of older and funky place, which is at least wheelhouse-adjacent for me. Except for lighting that was never updated after the energy crisis of the 1970s (ie “dark”), it was nice place, and we had a little patio that faced the water.

Day 3 – Mayne Island

After two eggs and bacon for breakfast – you probably sense a pattern here – we grab a ferry to Mayne Island, which is a small island. We van up the first hill, and then start riding around the island. Before the first mile is done, we hit a nice 19% hill, which sets a pattern for the rest of the week. If you’ve ridden the San Juans, the Gulf island roads are both hillier and steeper. My climbing legs are fine and I overall feel good – and I know today is going to be less than 20 miles – so I spend some time working on sprinting and waiting. The morning I’m riding with the wife and offspring, so I climb and wait, and sometimes double a hill. We descend back down to the water on the East side of the island, and pull into the Bennett Bay Bistro for lunch. I have the Santa Fe salad, which is pretty good.

We climb back out for our ride to the ferry; I wait after the first hill and tell the wife I’m going to do an optional section. I ride off and immediately miss the turn to the optional section, so I just ride the rest of the route down to the ferry and the climb back up from the ferry to find the group. Percy and Grace pass me on the downhill, and after I start to head back up the hill I hit the wife and offspring. Offspring turns off towards the ferry, and I redo a little loop with the wife.

The ride ends up with 17.1 miles and 1991′ of up. Anything over 100′ per mile is pretty hilly, and though I missed the optional part – which was only about 3 miles long – I did a nice hard ride. We ferry back to Galliano.

Dinner is at the Atrevida – which Google translate tells me means “cheeky” in Spanish – restaurant where we are staying. I order the Goat Cheese Wild Mushroom stuffed chicken breast.

Cheeky it is, for when my plate shows up, it is a breast with a small thigh attached to it, and it can’t weigh more than 4 ounces. There is a tiny amount of stuffing, and as far as I can tell, no goat cheese at all. The wife takes pity on me and gives me a piece of her rack of lamb, which is nicely done. I go back to the room and snack on the bag of nuts that I brought along, because I’m still hungry. I’m now 2 out of 2 for disappointing hotel food.

Day 4 – Galliano Island

Today we are going to ride around Galliano Island. I decide that two eggs isn’t enough so I order 4 eggs and ham, and gladly eat the 4 eggs and bacon that show up. They’re nicely done, so I’m fine with it.

My plan today is to ride solo in the morning and take it from there. I’m going to do the long spine and then an optional section and maybe a quick out-and-back before our lunch at lover’s leap.

The first climb is over pretty quick; I feel a bit heavy in the stomach from the big breakfast but that settles down and I start making time. I hit a turnoff down to the water and head down and the crappy road gets crappier and crappier, deteriorating into totally torn up pavement at the bottom. I take a picture at the bottom, and then head back up the crappy road and back onto the route.

IMAG0181

Very soon, I turn right onto the optional section which resolves into a steep climb; the Garmin says 13-15%, and that’s pretty much what it feels like. It then settles down into a generally down but sawtooth profile, and after about 3 miles of that:
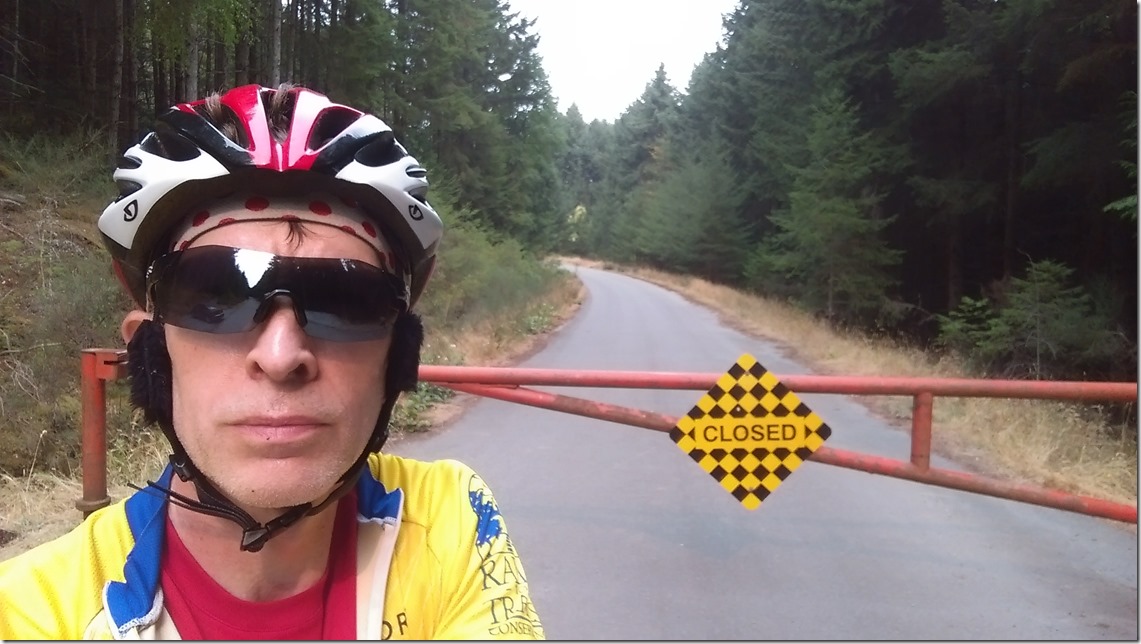
IMAG0183

I can fit the bike under it, so it obviously doesn’t mean me. Another mile or so, and I come to a signed private drive. While I’m generally adventurous (not really, but that’s what I tell myself), ignoring that sort of sign in a foreign country seems like the wrong thing to do. I don’t think organized group rides should involve that sort of thing.

I ride back and hit the main route where the van is waiting and Percy and Grace (still not their real names) have just arrived. My family has turned down the turnoff to the water I did earlier, so I head back to find them.

I blow by the turn, ride for 5 minutes, stop, pull out my map, ride some more, and finally get about halfway back to the end before I figure it out. I turn around and time-trail my way in the correct direction, and get to lunch about 10 minutes after my family pulls in. Lunch is wraps (again), so I eat the filling of a couple of wraps, drink a caffeine free diet pepsi (ie brown flavored water), and rest while the rest of the group watches a pod of orca go by, trailed by an assortment of whale-watching boats.

The family gears up and heads to the northeast end of the island. We drop the offspring at the van on the way back, and then head out on the last 13 miles with the wife. Kim does well until we descend to Montagne Harbor and need to climb back up; there’s a steep hill (say, >17%) that climbs up about 300′. I scout ahead while Kim walks, and then I return to tell her that it’s not that far, and pretty soon we are at the Hummingbird Inn to load the bikes up and have a snack before the ride back to the ferry. I have the traditional post-ride snack; a diet coke with a side order of cole slaw.

Given my extra bit of riding, I end up with 50.7 miles and a significant 4745′ of up for the day. 

Because it’s past labor day (many restaurants have closed) and we have a tight timeline to hit the ferry, we get dinner from an Indonesian/German food truck on the ferry dock. I play it safe and have a decent hamburger. We get the ferry and head over to Pender Island, where we are staying at Poet’s Cove Resort & Spa, “where inspiration lives”, along with a bunch of people with really nice boats. Apparently the poetry gig is paying better than I thought. The rooms are nice and we have a view of the bay, and they also feature sliding doors that lets you sit in the bathtub and look out at the bay.

Which is fine in concept, but they decided to use doors with slats that face down and frosted glass in the shower area, which means that you can’t use the bathroom in the middle of the night without lighting up the whole room.

Things like that really bother the designer in me.

Day 6 – Pender Island “make a choice” day

I like time on my bike more than most people, but after 4 days of riding, I’m ready for a day off the bike, and today is the day. Today’s breakfast features a custom omelette with a lot of veggies, and since omelette was small I add a plate from the buffet with some more eggs, some bacon, and 12 blueberries. We van over to the harbour to Pender Island Kayak Adventures, and spend a really nice three hours paddling with a great guide; definitely a nice and relaxing experience. I also learn that paddleboards are called “SUP” in Canada; I had previously refrained from asking, “What’s SUP?” to my companions with great difficulty.

Lunch is at the Port Browning Marina. Service is a little slow but I really like my steak salad, except for all of the tortilla chips that I forget to ask them to leave off. We van back and have the afternoon to ourselves; I gaze longingly at my bed and decide instead to head to the fitness center for a light workout and then a soak in the hot tub.

Dinner that night is it Syrens Bistro & Lounge in the resort. We get a place on the terrace, and I order an artisan green salad and the sockeye salmon.

I feel compelled at this point to engage in a brief exposition on the proper cooking of salmon.

The proper way to cook Sockeye is to heat it so that it is barely set on the interior, just enough so that the interior texture is no longer raw. It is delicious.

Before you accuse me of stacking the deck by ordering the salmon, I do not expect the Sockeye to be cooked properly. What I expect to get is what I call “tourist cooked”, which is the way that you cook salmon if you are serving it to tourists who might not like their salmon to be “raw”. Instead of just set on the interior, it’s cooked so that the interior is obviously done. If you think of it as the “medium” of steak, you’re pretty close. The texture suffers, but it’s okay.

What I get is the salmon equivalent of a well done steak, way past tourist. I do applaud their consistency; our guide has salmon that is cooked the same way. I really should send it back, but I eat it anyway. About 10 minutes after that, my salad shows up.

So, that’s a perfect 3 out of 3 in poor dining experiences at the places we stayed at, a pretty strong confirmation of my theory (p = 0.05).

Day 7 – Pender Exploration

Our last day dawns a bit wet, and it’s still misty outside.

I have my very predictable omelette/eggs/bacon breakfast, though I think “what the hell?”, it’s vacation, and go “outside the box” and have pineapple instead of blueberries.

The original plan is to bike a little, do a hike and eat lunch and the top, and then bike to the ferry. But the road are a bit too wet to ride, so the Gunnersons van up to hike. We start turn off at the eponymous Mount Norman Access Road, and start the hike.

It turns out it’s really more of a climb than a hike; with a lot of steep. After maybe 25 minutes and 600′ of elevation gain, we top out, walk to the observation platform, and take in the beautiful view at the top of Mount Norman (do you think the other mountains make fun of him?):
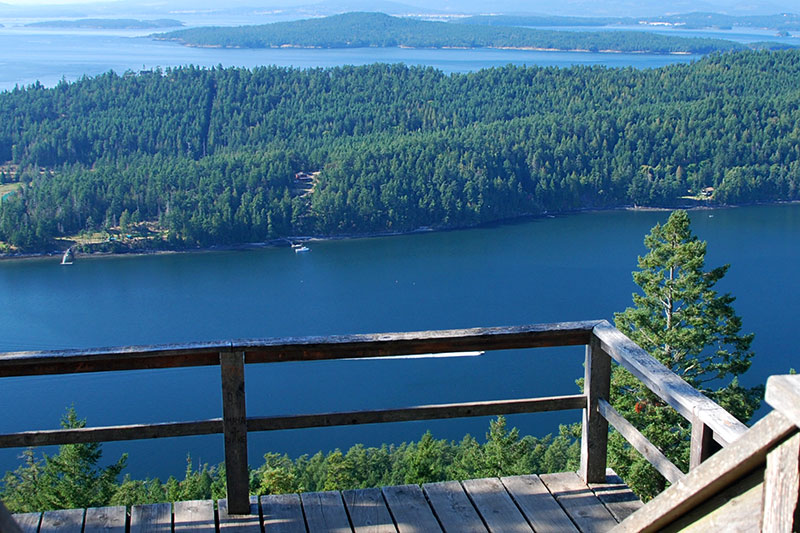
Or we would have done that, if it weren’t a foggy day. What we did instead was look out at a vast sea of whiteness, watching for the short periods of time where trees or water were vaguely visible.

But it was still a nice hike. We returned to the resort for a quick lunch, and then it is back on the road. Kim and I are the only cyclists for the day. One side trip takes us to a view, another takes us to a park that we are unable to locate, and we roll off of South Pender Island onto North Pender Island, and hit a killer hill.

Which makes me happy.

I haven’t mentioned it earlier, but Kim and Samantha have really been excellent sports on what has been a trip with a lot of steep hills, and not just steep in the 10% range, but steep in the 13-15% range, with a few steeper.

This is a honest 20% climb, but short, and we are soon rolling into the village center, where the van has just arrived. I drink a coke zero while the others snack on more carb-laden fare (okay, I had two pieces of gluten free peanut butter brownies, which were pretty much like eating peanut-flavored sugar cubes), and we headed out for the last little ride to our destination:

The Otter Bay ferry terminal.

We get there about ten minutes before the van shows up, and then the bikes go in the trailer and we get in line.

The ride for today is another short one; 16.4 miles with 1427′ of up.

I’ve been meaning to mention the ferries; the BC ferries run some very tiny boats, and then the run some big new boats.

That clamshell in the front is raised up for loading, and the lowered down for the trip. That allows them to operate ferries in much rougher weather than we see in Puget Sound. In the middle of the entrance, you can see a raised part sticking up.

The ramps lead down to the second car deck which is underneath the main one. Load it up, close the ramps, and the lower car deck is totally enclosed. A neat design. All the exterior doors on the passenger decks are heavy and power operated so they can seal tight.

The ferry ride takes us to Tsawassen, and we overnight in a hotel near the airport. In the morning, we leave at 6AM to van back to Redmond. Our border crossing takes two minutes; I am grateful that it is short but wonder what our border agent was thinking letting a van and a totally enclosed trailer through so quickly.

Totals:

Miles: 142
Up: 10,933′

Overall, it was a nice vacation. I liked the rides but the ferry logistics can be a bit tedious at times as you have to get to a specific place at a specific time, and I would have liked more bike time – or at least more options – on a couple of days. Our guide was great.


DORMAR Rider’s Guide

DORMAR is a backwards version of RAMROD. It differs from RAMROD by going the opposite direction and by being a totally unsupported ride. You will need good fitness and self-reliance to complete this ride successfully. DORMAR is 152 miles with a little bit more than 10,000′ of climbing, including two major mountain passes climbs.

The start

The ride starts in the Enumclaw Fairgrounds parking lot, at 45026-45098 284th Ave SE, Enumclaw, WA 98022.

The starting time is “Whenever you want”. I’m planning on starting at 5AM to get as much done before it gets too hot

The Route

You can find the RideByGps route here. You can download a route for your GPS from it; figuring out how to do that is left as an exercise for the reader.

A preview of the route is here. Please read it as it has important information.

Turn-by-turn instructions


Mileage Action Notes
0.0 Right
0.2 Right Highway 410
40.2 Right Highway 123 (Cayuse)
51.1 Right Towards Paradise
51.1 Water! Bathrooms!
70.1 Right Towards Paradise
72.2 Left Visitors Center
72.2 Left
74.5 Right Main road
74.6 Left Longmire
83.7 Store!
104.1 Store!
108.7 Right Eatonville – Alder Cutoff Road
115.9 Right Washington Ave
116.1 Stop Deli Stop (Cottage Bakery)
117.2 Right Orville Road
126.2 Right Store! Orville Road
135.4 Right Highway 162
136.4 L & R Onto Trail
142.0 Left Emory
142.0 Right Store! Highway 162
144.3 Left  Buckley
146.0 Right Enumclaw (410)
148.9 Right Warner / SE 456th
150.6 Left 248th
150.9 Stop Done!

Important notes

  • A blinky rear light and money are REQUIRED to get into the national park.
  • Pay attention to the lack of water stops at the start of the ride, and make sure you plan accordingly.
  • This is a long ride; make sure to turn your GPS to smart recording to save battery life
  • The descents will be long and fast. Please choose an appropriate speed.

Riding the Going to the Sun Road

We decided to spend a few days in Bigfork, Montana (a few miles south of Whitefish for my skiing friends) with my sister and brother in law. They graciously offered a room in their two-bedroom condo, and then my spouse graciously suggested that I bring my bike along.

I decided one day of riding was enough for our short visit, and I had two good choices

There was an 80 mile 7000′ ride around nearby lake Kookanusa, or there was a 60 mile 3500′ alp-ish climb in Glacier National Park, called “Going to the Sun Road”.

Both looked interesting, but I decided on the latter because a fondness for alpiness. This ride presented a bit of a problem; some of the sections that I needed to ride were closed to bikes from 11AM – 4PM. Which meant starting early – around 6AM – to finish in time, or starting late and likely finishing in the dark. I decided to do the early version.

Montana was in the middle of a hot spell, with daytime highs in the high 90s and the lows only dipping into the 60s. So, I packed a light set of bibs, my lightest base layer, and a jersey.

Precommute

To get from the condo in Bigfork – yes, that *is* the “big fork” in town, though it is not, in fact, the particular fork upon which the town is named, the actual one being of fluviatile origin – to West Glacier is a drive of about 45 minutes, which meant leaving sometime around 5AM, which in turn meant getting up at 4:30AM.

The getting up before dawn part of riding is not one of my particular favorites, but get up I did, along with the wife who was going to drive me there and then come and get me. And then there was the problematic task of getting dressed – problematic not because of the mechanics involved, since I am often able to dress myself on my own (though determining how well I accomplish that is a task I leave to others) and there were no buttons or zipper involved, but because of my basic riding gear and a bit of a surprise in the weather department, with west glacier forecast to be in the mid-40s overnight.

There was nothing to be done however, so I pulled on my “very hot weather” base layer, my pair of summer Castelli bibs, and my Sufferin’ Summits jersey.

I generally wear the Sufferin’ Summits jersey when I want publicity for the ride, which in this case is probably a bit pointless, but it is also white (part of the “let’s stay cool” theme) and has very deep pockets. And I threw on my PI sun shades arm warmers, because they work okay as arm warmers.

We load the bike in the car and start the drive to West Glacier. On the way, I eat 1.5 hard boiled eggs and a half cup of strawberries. I also dig through my bike bag and pull out my full-finger gloves, my toe warmers, my fleece hat, my light windbreaker, and my leg warmers. I do this because the temp at the condo is 49 degrees and it is steadily dropping during the ride, hitting a brisk 44 degrees by the time we get to West Glacier. I figure I’m just stuck with being very cold, but I step out of the car, put on the windbreaker, and discover that it’s a dry cold and it’s not that bad.

Thank god for low humidity; 44 degrees in the winter in Seattle means my winter jacket plus overpants plus neopreme shoe covers plus still getting cold.

I pull out my brown bag with supplies for the trip; it contains a half-bag of sport beans, a honey stinger waffle that I’ve been carrying around on rides for at least a month and which now consists only of crumbs, a small pump since the new bike doesn’t have one yet, a ziploc of nuts, a ziploc of cheez its, and my tic-tac container of electrolyte pills. I take a Rocketlyte before I start, hoping it will help with the on-bike nausea I’ve been getting (and by help, I mean “prevent”…)

Commute

This ride features an 12 mile flat commute next to a lake before the climbing begins. After a short 1/4 mile spin, I come to the park entrance and the ticket booths, none of which are currently peopled. A lighted sign points me off to the right, and I find a kiosk with envelopes I am supposed to put my entrance fee and write my name and address. Which presents a bit of a quandry, as I have no pen with which to inscribe said name.

I settle for composing a brief poem celebrating the life of John Muir and hum the first few lines of “The forest ranger song”, and hope that will suffice:

When we rangers ride the trail / In sunshine, wind or snow or hail
We’re always ready / We’re true and steady.
There’s a friendly laugh, a joke, / We’re cheery until we see a smoke,
And then we’ll fight, sir, / To get it right, sir.
We never leave a fire till no spark is to be seen;
Our job’s to guard the timber, keep the forest green

That sorted, I head straight and then turn right onto the Road to the Sun road, riding next to a Ackbar campground, named after the ever-popular “Admiral Ackbar” of the Star Wars franchise. I’m sure you can see the resemblance:

image

It’s brisk but really not too bad, and the combination of me warming up and getting next to the lake (which holds some heat) warms me up, except for my feet which are stubbornly frozen.

The lake on my left is Lake McDonald. According to the official Forest Service history, the name of the lake is in commemoration of an eponymous act of vandalism by trader Duncan McDonald who carved his name into a tree in 1878. Disappointingly, the official history is silent on further details, telling us neither whether Duncan ever owned a farm nor what kind of animals might have been kept on said farm.

Traffic is light, which is expected since it is currently 6:20AM on a Monday, but there are a few cars around. With one exception, they all pass courteously.

Preamble

The flat commute took me to the north end of the lake, which is fed by a stream that Wikipedia names “various stream”. The road parallels this stream and begins to climb up slightly, with extended sections of climbing with a 1% gradient. I grab 23 cheez-its from my stash, drop one, and stuff the remainder in my mouth, hoping to pre-fuel for the long climb ahead.

I get colder; the sun is technically up and you can see it on the highest peaks, but the western valleys are still in heavy shaded and I’m above the moderating influence of the lake. This persists until about the 21 mile mark.

Amble

The base of the climb is commemorated by a no passing sign. A search in Google Streetside did not find it, so I have recreated it here:

image

I did, however, find the following sign:

image

Luckily, rocks do not fall next to bicycles, so it seems that I am safe.

The climb will take me – with any luck – from 3500′ all the way up to 6647′, for a total climb of a whole lotta feet (927 meters, or just a little bit over 1 Tourmalet). I climb for about 5 minutes at about 180 watts, stop to remove my windbreaker and stuff it into its storage pocket and my jersey (if you do not own a stuffable windbreaker and a stuffable vest I do not know what is wrong with you), and continue climbing. After a bit I pick up the pace a bit, climbing at a little over 200 watts.

My feet are still cold.

My plan for the climb is to ride conservatively for the first half and then see if I have a few more watts in me, so of course I climb too hard at the bottom and have to back off a bit. The climb is very consistent at the 5-6% gradient that highway engineers love, and I’m climbing it at a little over 6MPH.

After a bit I hit “The Loop” switchback, which redirects the northwest road back to the southeast. I wave to a couple of touring riders taking a break in the parking lot, and continue to climb.

The combination of a low speed limit, small tour vans and coaches, and the “no passing” rule means that the traffic patterns are interesting. I might climb for 5 or even 10 minutes with no cars either direction, and then a stack of 10-25 cars will catch up with me and pass “en masse” (could I perhaps say, “en passant”?), only to leave my by myself for another long period. The road is has gotten the “A-list national park” treatment, which means great asphalt or concrete the whole way, with none of the chipseal I was worried about. Many of the drains are piped underneath the road, though there are a number of surface drains with grates over them. The Roubaix is fine with them going up and I make a mental note to be careful with them when I descend back down. The drivers are uniformly well-behaved with no bad passes, and the only hand signal I see is a thumbs up from one car.

The climbing continues. Since we are above treeline and the road runs somewhat in the same direction, I can see the road ahead for a mile or two. Once you reach the end of that part of the road, you are treated to a new vista and a new high point to which one will be climbing. This happens twice. At some point, I pass through 5000′, a point at which I’m about 12% down on oxygen compared to sea level, and shift down to my lowest gear. And keep climbing.

For those of you tracking things at home, my feet remain cold.

There are many water features on the way, notably haystack falls, bird woman falls, and the weeping wall. It’s getting past the peak snowmelt season, so the weeping has slowed down to something more akin to “tearing up”. I don’t stop at any of the features because a) climbing and b) 6 mph gives me plenty of time to look at them. I do not recommend spending much time looking over the edge of the road; that 12″ high stone barrier is often the only thing between you and a significant drop.

I would definitely describe the climb as “Alpy”. Great views and a road that is both very curvy and hung on the side of the road in places.

I still climbing along at about 6MPH, and I finally drop down to my 34/32 for the last little bit. I know it’s the last little bit because a) I’m watching the mileage and b) the road gets sunny up ahead.

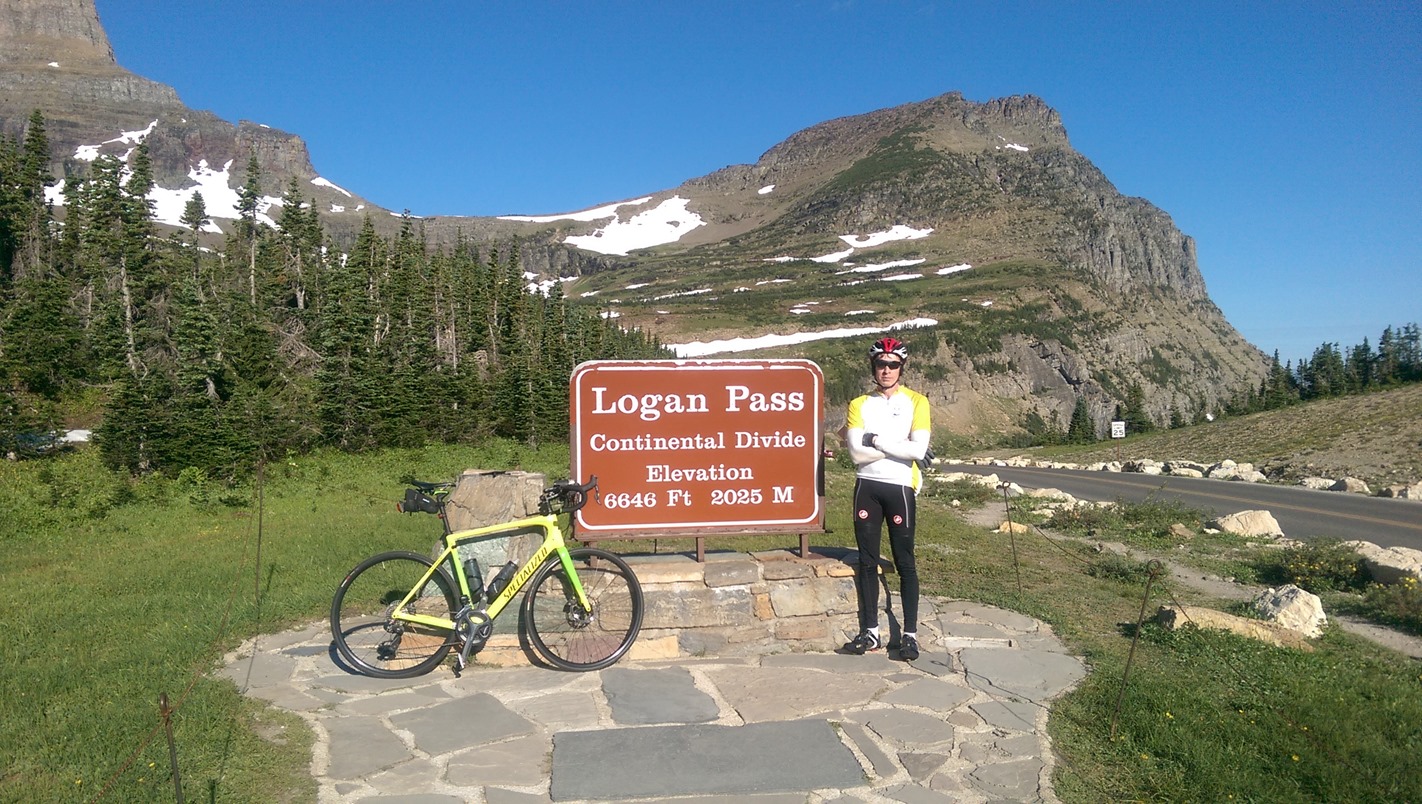
I finally crest the end of the climb and reach the top of Logan Pass, 6646′ up and on the continental divide.  The pass is named for William Edmond Logan, a Canadian-born geologist who later went on to star in an sci-fi thriller set in an idyllic society in the year 2274.

Image result for logans run

A brief rest to eat a few sport beans, gather a bit of electronic proof, chat with a few cyclists who climbed up from the other side, and put my windbreaker back on, and it’s time to head back down. I experience a short period of foot warmness.

IMAG0161

Descent

I like big alpine climbs, but I absolutely love alpine descents. In this one, the long and fast sections are punctuated by wet sections and sharp corners where too much speed will either send you into a rock wall our out into space, neither of which is particularly desirable. I have a bit of a quandry on this descent; I can descend slow but I’m back in the cold air and still a little sweaty, so I will be cold for a long time. Or, I can put a bit of power into the descent, warming me up and spending less time in the cold shade. I settle for the “bit of power” approach for the straight sections and the “slow” approach for the tight turns and the wet spots. My Roubaix’s disc brakes make this trivially easy, and I average about 20 MPH for the descent, completing it in a hair over 30 minutes.

Strava shows me that the fastest descender completed that descent in under 17 minutes for an average speed of nearly 37MPH, which is pretty much unfathomable to me.

Commute

At the bottom of the descent, it’s back onto the preamble and then the commute back. It’s at this point that I realize that if I had been smart, I would had a snack and a fair bit of water at the top so I could recover a bit on the descent (trying to eat and drink on alpine descents is not a good move), but I was not, and I’m kindof drained at this point. I stop at Lake McDonald lodge road to eat and drink, but the nuts and cheez-its that I eat and the water I drink are not a happy combination, so I add “upset stomach” to my “lack of power”, and just decide to slow down and spin my way back. I get back West Glacier at about 10:45, and the wife pulls in a few minutes late. Bike in the back, bike gear stowed, and a Coke Zero in my hand, and it’s back to the condo for a shower and some lunch.

Summary

A pretty nice ride. I’m happy that I was about to climb at an honest 2000′ per hour for the whole climb while feeling pretty decent; being lighter definitely helped. I’m less happy that I’m still working on fueling and hydration, but such is life.

Stats

  • 64.4 miles
  • 4080 ft of up
  • 14.0 MPH average speed
  • 2484 kJ/calories
  • 1 HC hill climbed
  • 0 STPs
  • Strava extreme suffer score (173).

Strava link


Postscript: It has been brought to my attention that the name of the campground at the south end of the lake is “Apgar”, not “Ackbar”, and rather than being named for a character in Star Wars, it is in fact named after the name given to a method to summarize the health of a newborn. We regret the error.


Tour de Blast 2017

After deciding not to do the full Flying Wheels route this year, I wanted a substitute, and I decided to journey south to Castle Rock to ride Tour de Blast. My wife came along to ride the 30, and planned to do the full 82.

We left Friday afternoon at 2:30, and spent a full 4 hours getting down to Castle Rock. It’s quite a ways even if there is no traffic, which of course never happens around here any more. As much as I hate getting up early to ride, I would almost prefer to do that and miss the traffic. We stayed in the TimberLake Inn in Castle Rock and had a decent mexican dinner that night.

We woke up the next morning at 6AM, and I had a wonderful meal of a chocolate brownie clif bar, some blueberries, and a glass of water. I’ve been eating low (er) carb, and I’m still trying to figure out what I want to eat before a ride and didn’t plan well ahead of time, so it was whatever I could find it the store.

We left the hotel at around 7 and got to the start at maybe 7:25, parking in the baseball outfield. Then it was a walk to pick up our packets, a walk back, and I headed out.

Well, not quite; I spent a lot of time trying to decide what to wear and what to carry; the ride has a reputation of cold (and wet) at the top, and even though the forecast was decent it tends to be windy up there. I settled on arm warmers, no leg warmers, summer gloves, and I couldn’t decide on whether to carry my stuffable vest or my stuffable jacket, so I ended up carrying both. Plus phone, cheez-it’s and electrolyte tablets.

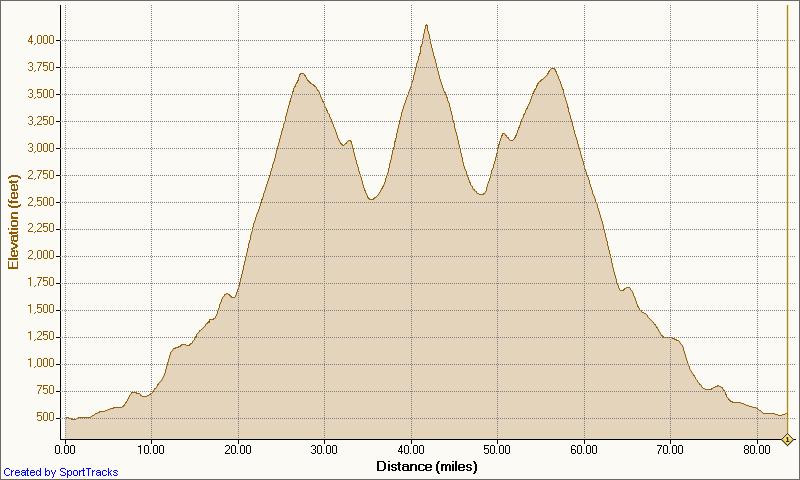
The ride profile looks like this:

I like to break rides into sections so I can keep them straight in my mind. For this ride there is:

  1. Warmup – the first 18 miles or so, which has a little over 1000′ of up.
  2. Elk Rock climb – 2200′ of up over 7.7 miles
  3. Descent + Johnson Ridge climb – 1650′ over 5.7 miles
  4. Descent + Elk Rock backside – 1400′ (ish) over about 8 miles
  5. Return to start: 3250′ down over 27 miles.

Here’s a 3d view of the route:

image

Warmup

I am just warm enough as I spin out of town with my stuffable vest on. We have a little flat, and then slowly start to climb up; there’s a lot of road in the 1-2% range, with a few kickers in the 6% range. I pass quite a few people, but since this is a three-route ride (there is a 30 and a 52 variant), that doesn’t really mean much. My legs feel decidedly meh and my stomach is a bit weird, but I’m okay overall. I’m trying to climb at about 175 watts, which is a pretty good “all day” pace for me generally. I push it up to 225 on one of the kickers, and feel a little bit better, which is a good sign.

At 15 miles we hit the first rest stop; I have drank maybe a third of my two bottles so I just keep going. Right near the 20 mile mark, we hit the start of the Elk Ridge climb.

You can always tell when the highway engineers got involved when you are riding in the mountains, because the gradient is typically arrow-straight. You wind around, you go over bridges, but the gradient is very constant, at about 5%, with a little over and a little under in places. I start at about 200 watts but decide that’s a little too high, so I drop down to about 180, and average 181 watts for the whole climb. My vertical meters per hour is a disappointing 550, but I do have a couple of significant climbs in front of me.

The climb itself is okay; the road itself is chipseal but they nicely decided to leave a little margin on the shoulders uncoated, so there is generally smooth surface to ride on. The bridge are big and long and provide either beautiful views or slightly scary heights depending on your perspective.

I pass people, people pass me, and I spent a bit of time chatting with those who are close to my speed. 70 minutes or so later, I hit the Elk Rock rest area. My stomach is still feeling a bit weird on my electrolyte drink, so I fill up my empty bottle with water, have a couple of potatoes with salt, skip the grilled hot dogs, and head back out.

Johnson Ridge

A short bit of up and I find myself on the Elk Rock descent. It’s a nice descent, broken in two by a short and easy (2%) uphill section, with a couple of sweeping turns. Most of the time I spend in the low 30s, spun out in my largest gear, and 8 miles doesn’t take that long at that sort of speed. I’m now back down to 2500′ and will need to climb up over 4000′.

Johnson ridge is named after David Johnson, a geologist who was on the site when the mountain erupted on May 18th, 1980. It provides – weather permitting – a spectacular view into the crater.

But first we have to get up there…

I felt pretty good on the descent, but as I ramp up for the climb, that feeling dissipates, and I am left with some nice low-grade nausea. Nothing really seems to help; water makes it worse, electrolyte drink makes it worse, cheez-its (which I generally tolerate very well) make it worse. The only thing to do is to stop drinking and keep climbing.

This climb is harder than the Elk ridge one, as the grade is often in the 7-8% range and touches 9-10% in places. I whine to myself, suffer, get passed, suffer, get passed some more, and keep going. My butt is a bit sore, my back/shoulders hurt, my stomach is upset, my pulse is pounding in my head, my head aches a bit, and my tinnitus is acting up.

The only thing really keeping me going is the knowledge that I have an out – my wife is planning on driving up to the observatory after she finishes (which she already did), so I have the option of hanging around and waiting for her. An estimated 35 hours later, I finally top out (actually, looking at the data, I climbed the 1650′ in 54:33 @ 553 meters / hour and 171 watts, so pretty much the same pace as the first climb. Did not feel that fast.

I walk up to look at the mountain (covered in clouds), and head to the food tables. I carefully get off my bike, take a drink (nope, still feel sick), text the wife (a really poorly worded “At top. Probably done”), and chance half a banana. Nope, still feel sick. Start composing my ride report, and decide to call it “Tour de Fizzle”.

Sit around in the sun a bit, talk to one of my friends about my new bike, sit on a bench, and finally am able to get some fluid down without feeling horrible. Wait for the wife, and wait some more.

Elk Rock Backside

Finally get cold and am feeling better, and decide I need to get down off the hill, and hope my wife stops when she passes me on this section. This descent is fast, my arms are shaking because I’m cold so I can’t steer very well, and my wife passes me headed up maybe 2 minutes into the descent. Sigh.

A couple minutes later I drop farther into the valley, it warms up maybe 15 degrees, and I stop shivering. Down, down, and down, and I’m back in the valley between the ridges, and it’s time to climb up. Coat off and put away, arm warmers off and put away.

This first part is the steeper part of the climbs; I saw 8% on the downhill and expect it to be pretty bad coming back up, but I set a power target of 150 watts and climb @ 5-6 MPH and it’s really not that bad. I pass a few, get passed by a few others, and finally reach an intersection that marks the end of the steeper part. A short descent, and then it’s onto the longer but flatter upper section.

This is supposed to be easier, but I feel worse than the first section, and I’m climbing at a seriously slow 130 watts. I stop a couple times to rest, and then see my wife pass me going the other way, and when I don’t see the car at one of the pull-outs, I know that my lack of good instructions means she went back to the starting point to wait for me. I stop a couple more times, and the last time my background nausea asserts itself, and I sit there trying to control my stomach for a couple of minutes. Successful, I get on the bike and continue the upward grind. I am climbing at a breathtaking 340 meters/hour.

Finally we top out again, and I pull into the Elk Rock food stop for a second time. Nothing looks good and I don’t really need water and there’s no cell service, so I can’t text my wife, so it’s back on the bike and heading down. At least it’s a descent, and I descend all the way down to the site of the first food stop, pull over, and text my wife that I am starting down and to come and find me. And she does, meeting me at the 72 mile point, which ends my ride for the day. A bit of jerky (which I stupidly chose not to stuff in my pockets) and a full coke zero, and I feel somewhat human. Just in time for the 4:30 drive back, which thankfully I did not have to do.

Stats etc.

71.6 miles and 7001′ of up with a moving time of 5:45 and an elapsed time of 7:00. So, slow and with more than double the time off the bike I would expect. It ended up as an “Extreme” suffer score of 230, but I think the only time I’m suffered more on the bike was the time I climbed up Cayuse in 100+ temperature.

Overall, the ride is okay. I liked it much better than High Pass Challenge because it doesn’t have all the flat section. Will I do it again? Well, it’s a long trip to get down there and a long trip back, and that does deaden the experience a bit, but maybe.


From carb-optimized to fat-optimized: a brief summary

(I’ve written this from a cycling perspective, but I think the basic idea – going from a carb-optimized metabolism to a fat-optimized one – has a broader application).

For those who don’t know me, I’m a fairly typical recreational cyclist; in season I’m riding 3 times a week, generally anywhere from 75 miles to 120 miles, with a few goal events (I tend toward hilly events, such as RAMROD, Passport 2 Pain, and my very own Sufferin’ Summits).

Over the years, I’ve mostly used a low-fat diet; one focusing on low-GI carbs (brown rice, whole-wheat bread, etc.) for my normal diet, and one with high-GI carbs before, during, and after my rides.

That has worked okay, more or less, with a few issues:

  • My stomach is often not very happy with a slug of sugar-based nutrition drink during a ride (I have fructose intolerance, which may be part of it).
  • I generally feel tired when I get to about 4 hours on the bike. Not leg tired, but just a general overall feeling of fatigue.
  • I have a really hard time not snacking between meals. This was not helped by having candy readily available at work, but even without that, I still had a hard time not snacking.
  • I also had a related problem. I ski and teach skiing during the winter, which means that I have no weekend time for rides from December through mid-March, and a lot of chance to snack after skiing. Those combined with my work snacking, and in early 2016 I was at 178 lbs, about 6 lbs above my traditional adult weight of 172 lbs.

    Some of you may be saying, “that’s not that heavy for an athlete”, and that’s true, but I did not like the trend.

    I read a book on nutrition that had been sitting on my Amazon wish list for a year (reference below), I asked a few cyclists at my company about their experience with a lower carb approach. And I did a lot of research about nutrition and metabolism in general; if you want to talk about insulin, glucagon, ketosis, I can go on for quite a while, and I can also talk a bit about the current state of clinical measurements (HDL, LDL, LDL-P) and their relation to cardiovascular disease.  Oh, and the experience of indigenous people such as the Inuit and what happened when they started to eat a western diet.

    My conclusion was that I was eating quite a few carbs in my diet and not much fat, which meant that my body was going to be optimized towards using carbs as a fuel source. My other conclusion was that eating the carbs was contributing to my snacking, because a) the insulin response to the carbs would tend to drop my blood sugar back down and b) the lack of fat wasn’t making me feel satisfied after a meal.

    So, it was time to experiment. I’m not somebody who likes to make giant changes in my diet all at once, so I focused on lunch, especially at work. Here’s what I was eating before:

    Monday: Burrito day. A whole wheat burrito, black beans, rice, chicken breast, cheese, guac
    Tuesday: A half sandwich; chicken/turkey breast, cheese, lettuce, tomatoes, pickles, mustard
    Wednesday: See Tuesday
    Thursday: Taco salad day. In a tortilla bowl, black beans, rice, chicken breast, lettuce, guac, olives, cheddar cheese
    Friday: See Tuesday

    Just writing that, wow, that’s a lot of carbs. And wow, my cafeteria is boring.

    Here’s what I switched to:

    Monday: Mexican day. Black beans, half chicken & half pork, onions, lettuce, cheese, guac
    Tuesday: “Barbecue day”. Either brisket or a half chicken with cole slaw, and a tiny square of cornbread
    Wednesday: Salad. Greens + tomatoes, cucumbers, peas, kidney beans, red bell pepper, sugar peas, olives, mozarella balls, eggs, and chicken thight. All topped with an oil/balsamic vinegar dressing.
    Thursday: Mexican day repeat
    Friday: Salad repeat

    Gone are tortillas, bread, rice. Added in are more vegetables, and considerably more fat (pork, brisket/whole chicken, chicken thighs, salad dressing)

    The change was surprisingly easy, with the hardest part being changing my perception of fat. And I noticed an immediate effect on how I felt at work; I was less tired in the afternoon and I stopped snacking totally (it did help that the snacks moved out of my room).

    I switched out my sugar-based hydration drink with an electrolyte one (Nuun has bothered my stomach and I don’t like plain water on rides, so I’m using Hammer’s right now), and went on a few rides.

    And hated it. I means, seriously hated it. I was not running out of energy per se, nor did I have much hunger, I just could not put out any power to save my life. I played around with food with different levels of carbs before and during (I still think a carb recovery drink makes a lot of sense after a long ride), and it has gotten better but I don’t think I have that part figured out yet. More about that later.

    That was working well, so attacked my breakfast next, which was a bowl of granola with fruit. I added an egg (sometimes two) in the morning and reduced the granola, and that’s where I am right now. I honestly probably need a bit more fat in the morning but it is so hard to change ingrained habits. I also changed my dinner patterns a little, trying to focus more on the protein/fats and the vegetables and less on the carbs. Also still a work in progress.

    Oh, and for snacks at home, I’m eating cheese, home-made jerky (time to make a new batch…), and a fair bit of nuts. I’ll have some popcorn now and then, and maybe some chips.

    One thing to stress is that, with the exception of paying attention to my snacking habits at work – where I have a “drink a glass of something first before you eat” rule – I’ve put pretty much zero effort into limiting my portion sizes. I just eat what seems decent, and stop when I am done.

    Results:

    My expectations weren’t very high; I would be happy if I got down to my usual weight and felt a little better on the bike.

    What happened is that in about 3.5 months, I lost a full 10 pounds of weight, clocking in at 168 lbs this week. My summer shorts fit nice and loose, and today I pulled on a pair of 501s that I hadn’t worn for about 9 months, and they fit fine.

    On the bike, I’m feeling strong but I feel like I might be missing a bit of my top end. On the other hand, last week I took 33 seconds off of my PR on a 7 minute climb and some of my riding friends say I’m faster, so maybe it’s not as big as I think, or maybe it’s just different. I have definitely felt less tired after a few hours on the bike, and my stomach is much happier on the bike.

    References:

    For a lot of reasons, low-carb is still fairly controversial and a number of sources say that its not healthy and you’ll grow a third arm or something. Much of that is due to the evolution of thought around the role of cholesterol levels in the blood, from “cholesterol = horrible” to “HDL / LDL” to “hey maybe LDL as a measure doesn’t work, how about LDL-P”. Remember that dietary guidelines have a *huge* lag time behind current research, and there is lots of out of date advice out there.

    If you read anything, read a copy of “Why we get fat” by Gary Taubes. He may not have the whole story from a biochemical standpoint, but his overall presentation is very good. If you like lots of details, read his “Good Calories, Bad Calories“, but be prepared to bone up on your biochemistry.

    Joe Friel – author of many training books for endurance athletes – has written some very interesting blog posts about low carb. In “Aging – My Race Weight“, he details an experience very similar to mine. Read “Becoming a better fat burner“. And read the comments on these posts as well.

    If you are looking for research into low carb and performance, there is a decent summary here. Note that most of the investigation has been purely around performance, and the results seem pretty clear that low carb does not increase performance and may take a bit off the top end (perhaps in some people, perhaps in all). What the studies miss are the things that I really care about; if I don’t have to eat as much on the ride, I avoid the stomach issues that I’ve had over the years, I (hope) that I will have less trouble with low energy during the ride, and the obvious performance advantages of less weight.

    If you want more details and/or references, please let me know in the comments.


    The DeWaltCast – Portable Chromecast Audio

    I have recently updated my custom late 1990s multi-room music system to the 2010s with the installation of a Chromecast audio in my main equipment system. It is exactly what it should be; easy to use, easy to understand, and cheap.

    But I was noticing recently that while it works fine when I’m in our upstairs kitchen/dining/living room area, I don’t have the option elsewhere. What I really wanted was something I could take out to the back patio for a bit of background music. I could have bought any of a number of small chromecast audio speakers, but they all required AC power, and in my stupidity I did not add a convenient outlet near my patio when I redid the basement.

    I did some research, but I couldn’t find what I wanted, which was a system that would run either on battery or AC and didn’t have rechargeable batteries. I did some searching and researching, thinking about how I might buy a small boombox system, but the ones I found all used disposable batteries. Then I finally remembered that I already own the basis of such a system.

    A DeWalt DC011 Jobsite radio. It is rugged, has an aux input (and a charming CD case on one side), but the really nice part is that you can plug a DeWalt battery pack into the back and not only will it use the battery pack to play the radio, it will also charge it whenever you plug the radio into an AC outlet. And I just happen to have a couple of 9.6 volt packs from a DeWalt drill that I recently deprecated in favor of a nice brushless Makita that I picked up. My radio is much, much dustier than the picture but still works okay, except that the optical encoder for tuning doesn’t really work.

    The sound is okay, and I’m not looking for high-fi for this application, so that is fine.

    This should be a very simple project; I just need a source of 5 volts to run the chromecast and a place to put it.

    Nicely, the front is held on with 8 screws on the front and 2 on the rear, and then it just pops off. I expected it to be cheaply made, but the design is really pretty nice; instead of soldered wires between the boards there are real connectors. The only thing I find curious is that the battery charger is a hefty 4″x5″x1.5″ fully enclosed metal box at the bottom of the case, which explains a bit why the radio is so heavy.

    A little bit of snooping has me a bit confused; there are nice red and black wires from the battery to the main board, but where I would expect a power cable to run to the radio, I see a 5-conductor ribbon cable instead.

    image

    I pull the power supply board and start tracing the back.

    image

    The filter capacitor is very obvious, and it turn out the the 5-conductor ribbon cable *is* the power supply cable; 3 conductors for positive and 2 for negative. A quick check with the meter shows that there is is no power across the filter capacitor, which makes no sense at all.

    I look a bit closer, and realize that the whole board has a nice clear conformal coating on it, another sign of the build quality. I scrape it off the leads of the filter capacitor, put my meter on it, and find about 10 volts when on battery power and 14 volts when running on AC. That is a goodly amount of voltage.  I make a little power take-off harness and solder it to the terminals of the filter capacitor, and then reinstall the boards back in.

    To get to 5 volts, I go searching. I want a buck converter that gives me 5 volts. The internets say I need around 250 mA, which pretty much any converter will give. There are hundreds of choices, but I settle on one from Xiny:

    Like pretty much all of these, it’s made in China, but it appears to have reasonable build quality. I will just need to attach the wires, plug in the USB cable to the chromecast, and then run the audio to the aux.

    While waiting for the buck converter, I hook up the Chromecast. I pull the aux jack out of the mount, plug in the cable, and temporarily plug the USB cable into power from the supplied wall wart. It fires up and starts working correctly. I hot glue it to the side of the case, and start to lay out the cables the way I want them…

    image

    Power

    With that all sorted, all that is left was to hook up the power and close up the box.

    image

    I attached the incoming power to the screw terminal block on the left, tested that it really was giving me the 5V that I expected, and then plugged in the USB cord.

    Finally, I tucked the power converter into a spot in the case and glued it in:

    image

    I plugged in the front panel & speakers, put it on the box, powered everything up, and started ‘casting to it. And sound came out the speakers.

    *Most* of the sound was the sound of music. But there was a background of sound that was there even when the music was not playing. It was motorboating. There was a popping at about 8 Hz that would go for about a second, then stop for a few seconds, and then repeat.

    Maybe it was the power, maybe it was the radio section of the radio interfering with the comcast. It would have been really smart of me to test all of this before I hot-glued it all into the case, but I pulled it all out and started eliminating causes. It is not the location of the chromecast or the short cable that hooks to the aux jack. It is not a ground loop. It pretty much has to be the 5v dc-dc converter.

    I tried the usual hacky things. Capacitance on the unregulated input did nothing. Capacitance on the 5v output did nothing (well, it popped when I hooked it up, but nothing else). I put a scope on it, and could see the pulse train from the 5V output.

    This was not entirely unexpected; one of the great things about our world is that there are lots of cheap components out there, but unfortunately this is also one of the problems.

    I let it sit for a day, and then decided to try hooking the input to the battery instead of the power supply output to see if that made a difference. And the noise went away.

    Unfortunately, the reason it went away was that instead of hooking the battery voltage – nominally 9 volts – to the input of the converter, I hooked it to the *output* of the converter, and pretty much immediately fried it. Worse, I had the chromecast plugged in at that point – because stupid – so I toasted the chromecast as well. I may try to pop it open and see if I can salvage it later; it seems to be cycling power on and off rather than just being dead.

    Which led me to ordering another chromecast, and a different converter board. This time I got smart and found a board that people had been using to run a chromecast in their car.

    image

    In typical “explosion of search terms” fashion, this is the:

    Yeeco DC-DC Buck Voltage Converter 10-24V 12V to 5V 1.5A Step-down Volt Transformer Stabilizer Voltage Regulator Module Vehicle Car Isolated Power Supply Switch Inverter Board with 5V USB Charger

    The cool part of this device is that it’s actually an isolated design, which means there is no ground-to-ground connection between input and output.

    In due time, the Yeeco showed – along with the new Chromecast audio – and I hooked everything up, and it worked very nicely. The components were stuffed in the case:

    image

    Then the case was closed up, and I was finished.

    When in operation, the source electronics are silent – or at least more silent than the electronics on the amplifier. When you first turn it on, there is a short bit of noise as the Chromecast audio wakes up, which I’m calling a feature rather than a problem.

    So, there you have it; for about $50 you can add ‘castability to an old boombox. Or, you can add another $40 if you don’t pick the right components and hook up the wires incorrectly.


    Quick Review: Specialized Roubaix Expert Di2

    A long time ago – in 2004 or so – I bought my first high-end road bike, a 2005 Trek Madone 5.2, and over the years, I probably put around 30,000 miles on the bike. It has been a great bike.

    But my early-50s body is not as flexible as my 40-year-old body was, and I’ve been having some persistent shoulder and neck issues despite having a good fit and spending some quality time with a PT, so it was clear that it was time to do some bike shopping.

    And yes, it’s very clear that I am different than many of my riding companions, who seem to rotate their bikes every 3 or 4 years, or the rest of my riding companions who subscribe to the “N+1” theory of bike ownership (see footnote).

    On my shopping list:

    • A smaller frame (my Trek is a 60cm, and a 58 seemed like a better choice)
    • Disc brakes, because I’m doing a lot of steeps and I’m tired of wondering if I will stop at the bottom.
    • Low gearing. With the hills I climb, I need something close to 1:1.
    • Full Ultegra (or very close) for the groupset.
    • A bike tuned towards the kind of riding I do (ie endurance) rather than racing. A little more compliant, a little more comfortable, and a little more upright.
    • A decent color combination. My Madone is a Project One featuring the “Pave Flambe” paint scheme (bright red with flames), and I’m not a big fan of colors like white, black, or charcoal.

    Armed with that list, I headed out to the bike manufacturer websites and started coming up with options.

    Well, that’s actually not quite true; what I *really* did was procrastinate for about 9 months, scrawl a list of bikes on a piece of paper that I promptly lost, procrastinate another 3 months until my back got worse again, and then finally come up with a spreadsheet of choices. The wait turned out to be a good thing, mostly because bikes with 34 tooth chainrings and 32 tooth cassettes got a lot more common, so I had more choices.

    I won’t bore you with the full list, but Trek was out because of their price point, and the short list was the Cannondale Synapse Carbon Disc, and the Specialized Roubaix Expert Disc. The Synapse comes in at $3000 ($4500 for Di2) and the Roubaix comes in at $4000 ($4600 for Di2). The premium for Di2 on the Roubaix looks about right, but the Synapse is a bit weird; there are a couple of upgrades in there (better brakes, for example), but not enough to warrant a 50% price increase IMO.

    Test rides:

    I rode the Synapse first, in the mechanical Ultegra (mostly) variant, from Gregg’s in downtown Bellevue. I rode around the steeps and some crappy pavement for about 45 minutes, and the bike climbed and rode fine, but the position felt a little different. Not bad different, but it took a bit of time to get used to. Seemed to plenty stiff but still more compliant than the Madone. The color was a bit meh but not terrible, back with green lettering and some red strips. I should note that the Di2 variant was on sale for $4000 during this time, so the pricing was roughly in line with what I would expect. I liked the bike, and felt that I was on the right track.  

    Later that morning, I headed off to Edge and Spoke in Redmond to test ride the Roubaix. Their test fleet is all Di2 and festooned in the Neon Yellow/Monster Green paint job (the bike is also available in black with grey accents). I took it out and headed to some annoying pavement, the bike lane heading south on West Lake Sam from 520. It felt nice on that but wasn’t really as compliant as I expected. I then sampled a bunch of different ups and downs, some crappy pavement, and even some gravel. The bike felt more similar to my Madone than I expected in handling, and – like the Synapse – handled climbs, sprints, and descents well.

    I liked both bikes but it was pretty clear that I liked the Roubaix a whole lot more, and I also decided to spend a bit extra on the Di2. My options were to wait for a black version until late April, wait for a yellow/green version until sometime in the summer (August was the best estimate), or take the demo bike, so I took the demo bike.

    Fit:

    I knew I wanted a full fit, and scheduled one for 4PM a couple of days later. IIRC, this is my 4th full fit. Edge and Spoke have a Retul fit bike that allows for adjustments of most of the components while you are riding on the bike, which makes the whole fit process a lot simpler; the only time I hopped off the bike was when we did cleat adjustments and saddle switching. The fit is improved by the Retul Vantage 3D Motion Capture system, which tracks emitters that are put on your feet, ankle, knee, hip, shoulder, elbow, and hand position 18 times a second.

    The system only works on one side at a time, so the fit is done on one side, then you get swung around to the other direction (the fit bike is on a turntable) and do the other side.

    The fit itself had about 20 minutes of flexibility and strength evaluations (very important, especially if this is your first fit), a bunch of time on the bike, some high-power tests, playing around with saddle options, and some cleat adjustment.

    I think this is the best fit that I’ve had; the fit bike really makes a difference both in time efficiency but in coming up with a good absolute position and then fitting the bike to that rather than starting with a current bike and going the other way. If you have biomechanical issues, a PT fit like the Corpore Sano ones are probably a better choice because I think adjusting people is better done by a PT, but I have less of an issue with that.

    I was especially happy to find a saddle that I am really liking; I’ve had issues with saddles for a while, but the weird looking Power Expert feels better than any saddle I’ve tried, at least during the fit.

    It took about 2 hours from the start of the fit to when I rolled out the door, though that did include paying for the bike.

    Riding the new toy

    I needed an appropriate test for the new toy, and this is the route I came up with. Zoo Hill (classic route), the backside of Summit, and then the painfully steep West Sommerset climb. The bike was very composed during the climbing and was fine when I stood, and even when I rode slowly (when I deliberately got down to 2.9 MPH on West Sommerset, it was pretty floppy, but that’s an absurdly slow climb, and it was fine at 4MPH or above). I did a bunch of standing, and the FutureShock didn’t get in the way at all.

    There are only two caveats, both during the descents.

    The first is that the brakes are both very powerful and a tiny bit grabby; the first part is great, and I expect that as they bed in better and I get more used to them, this will get smoother. I also noticed that when you brake hard, your upper body tends to be propelled forwards, which doesn’t happen for me on rim brakes.

    The second caveat is that these are decently light wheels and the rims do not have any weight devoted to a braking surface, so there is less weight at the rims/tires than the light wheels I have on my Madone, so the bike is very nimble and responsive at speed. This is actually my preference, but it is a bit of a surprise when you hit that first 35 MPH descent and need to maneuver.

    The FutureShock in the front steering tube is quite impressive. It doesn’t seem to affect the handling at all, and while you can make it compress when standing to climb or sprint, it doesn’t do that normally. It just takes a bit of the edge off of the bumps that you are hitting. It comes with two lighter springs than the one is installed; when I get a chance I’m going to try one of them.

    The expert also features the CG-R  – where “CG” stands for “COBL GOBL” (Cobble Gobbler) – seatpost, which has a fair bit of vertical compliance, and also softens the ride. And I think they’ve done something clever with the rest of the frame as well.

    It also has a very different set of bars – the Hover Expert Alloy Handlebars (HEAH?) – look like normal handlebars, but just outside of the center bars, they rise up 15mm (8.2 millifathoms), giving the rider slightly less of a reach.

    As far as the overall package goes, it has pretty much everything I wanted, and I didn’t give anything up, so yea!

    DI2

    DI2 Ultegra is just like a great version of mechanical Ultegra. It shifts great, and does neat things like trimming the front derailleur automatically so the chain doesn’t rub. And it can shift all the way up or down with a single lever press (well, button press and hold, actually). My bike has the version where the battery lives in the seatpost, so unless you look very closely, you can’t really see the system.

    I had assumed that DI2 was a fairly simple system, but that is not true. Each of the separate components has a microcontroller, and the components communicate each other using the CAN bus protocol.

    Yes, my new bike has a network. The same kind of network your car has.

    The cool part about this approach is that all of the components just plug together, and it’s possible to add auxiliary shifters to your top tube or to aero bars if you want them there. You can also send the data to some Garmin Edge computers, which you can use to record gear usage. If that seems useful to you.

    All of this is controlled by the very confusingly named “E Tube Project” application. With this, you can update the firmware on your components, and change things like the shift speed, which buttons do what, or even turn on synchro shift, which AFAICT lets you shift as if you had a single shifter rather than two shifters, with the system shifting both front and back automatically if necessary.

    Charging is done over USB using the programming cable; it plugs into a little junction box under the bars, which also has a battery indicator.

    Weight

    The weight is supposedly something like 18.5 pounds, though it was a bit heavier when we put it on the scales at Edge and Spoke. Part of that weight was the SWAT system:

    SWAT (Storage Water Air Tools) is a label specialized is using for some of their accessories, and one of them is the SWAT Box. It attaches in the bottom of the triangle of the frame (using two extra water-bottle mount screws), and is a system that is supposed to be able to hold:

    • A spare tube
    • A multi-tool
    • An inflator
    • A valve extender
    • A money clip (?)

    It also has room for a spare tube and a CO2 inflator.  That is what you get if you buy the $90 version from Specialized.

    To keep costs down, the one that ships with the Roubaix comes with a spare tube. And – as I discovered when I took it out, the spare tube is not a tube that would work on the Roubaix, as it’s far too big and it weighed in at a honking 120grams.

    If you have a black bike and the thing holds what you need – here’s a video of how it works – then I guess it’s okay. But on a non-black bike it looks ugly, and it doesn’t hold my wallet and keys, and at 165 grams empty it’s heavier than the 140 gram Topeak tail wedge that I use.

    Wheels

    The bike ships with DT Swiss R470 db wheels, which you will never forget because of the huge labels on the sides of the wheels. A few minutes with a heat gun and a can of “goo gone” fixed that issue. While I had the wheels and tires off, I did some weighing, and here’s what I got (disc and cassette weights are from the net):

    Front: 802 grams + 95 grams for the disc = 897 grams

    Rear:  936 grams + 95 grams for the disc + 292 for the cassette (11/32) = 1323 grams

    The wheels are decently light, and as I noted, there isn’t a lot of weight down at the rim. The only big downside I see is the profile; it’s not very aero for a bike in this price range.


    Footnote: The answer to the question, “How many bikes should one own?” is “<N+1>:, where N is the current number of bikes that one currently owns.


    DORMAR–the route + rider notes

    Redmond Cycling Club has put on their popular RAMROD ride – Ride Around Mount Rainier in One Day – for many years. It’s a great ride, but over the past decade has become increasingly difficult to get into, as the number of riders who want to do it is vastly greater than the number allowed by the National Park Service.

    DORMAR – RAMROD backwards – is an alternative for those who didn’t get into RAMROD. It is a non-organized ride; there will be a route and (probably) a specific date and time, but there is no support.

    Very tentative ride description:

    Here’s the current tentative route.


    Segment 1: Enumclaw to park entrance, 32 miles, 2450′


    The route starts climbing immediately, though it’s not that steep in most places. At about 18 miles we ride through Greenwater, but the stores will not be open early in the morning. Note that you will need to travel 51 miles and climb 4475′ before you get to water, so you will want at least two full bottles for this section. Luckily, the early hour will keep the temps low. Make sure your blinking rear light is on for this section.


    Segment 2: Cayuse Pass, 19 miles, 2025′


    After a couple of miles of gentle climbing, the road kicks up and it’s 6 miles of climbing to the top of Cayuse pass. At the top, highway 410 continues to the left and starts Chinook pass; we want to turn to the right and head towards Packwood.


    After this turn, we descend down the south side of Cayuse pass. The first 8 miles are fairly steep and then it flattens out a bit. On the descent at 51 miles, we turn right towards Paradise and Longmire. This is the Stevens Canyon entrance to the park, and we need to stop and pay the ($10?) fee to enter and show our rear blinky lights. After the entrance, we pull over in the “Grove of the Patriarchs” parking lot to fill our water bottles and take a nature break. I recommend trying to drink half a bottle while you are here because the next water is way, way up from here.

    Segment 3: Backbone Ridge + Paradise, 21 miles, 4085′


    This one is going to hurt.

    We first head up Backbone ridge, a 6 mile climb that takes us up 1250′. A quick descent, and we are quickly on the main pitch up to Paradise. The first 10 miles takes us up 2250′, past Reflection Lake (stop and take a picture, as this is probably the best view of the ride) and on to Inspiration Point – the high point of RAMROD. At that point we turn right towards Paradise and continue to climb the last 615′ up to the visitor center.

    Here we will stop for snacks, water, and a bit of rest. We have climbed 9000′ in the last 75 miles, and we have 1600′ of climbing in the next 75 miles.

    Segment 4: Paradise to Eatonville, 44 miles, 567′

    There is a small bit of climbing on this section, but it is countered by the 5180′ of elevation loss, so it’s downhill, downhill, and then more downhill. We head straight out of the Paradise parking lot and take the valley road. This winds around and joins the main road back at Inspiration point. Turn right towards Longmire, and start our descent. At 74.6 miles, there’s the Longmire store if you need supplies.

    At 104 miles we hit Elbe, and keep on the main road. At 108 miles, we turn to the right towards Eatonville.

    When we hit Eatonville, we turn right on Washington, and a watch for Cottage Bakery on the left, pretty close to 116 miles. This is the “Deli Stop” on this ride.

    Segment 5: Eatonville to Enumclaw, 35 miles, 1179′

    The last segment starts by continuing on Washington Avenue out of town, and then turning right on Orville Road East. This is a small sign and easy to miss.

    The route takes us by Ohop lake and Lake Kapowsin, and at about 126 miles we hit a stop sign. There is a Texaco station and a grocery if you are in need of supplies. Turn right to stay on Orville Road East.

    Eventually, we hit another stop sign at 135 miles, and turn right on Pioneer Way East. We can take this all the way into South Prairie, OR, at around mile 136, start looking for a trail that parallels the highway on the left, and get on it going in the same direction. This will take us 5 miles into South Prairie. Arnold’s Grocery is a nice place to food up.

    A few more turns and a few more miles, and we are back to the start.


    Advanced Garage Lighting

    I’ve had a project floating around in my head for a number of years…

    We have a two-car garage with a nice white door that faces the street. I would like to use it as a canvas for something more interesting. My first thought was to build/buy/adapt a laser projector, and while I think that would be a fun project, it would unfortunately involve aiming laser light back towards the garage, which isn’t really the safest thing in the world. I’d also need to put the projector out in the rain someplace, so despite the whole “pew pew” lasers thing, I shelved it.

    I’d also considered using some addressable LEDs, but for the first ones were pretty pricey, and I hadn’t figured out how I wanted to control them.

    Recently, the project jelled (gelled?), and here’s the plan:

    • A 5 meter (2.73 fathom) strip of addressable WS2812 RGB LEDs, with 60 LEDs/meter so a total of 300 individual LEDs. This will be mounted under the front eave of the garage facing down and back towards the house. I chose these because they are the cheapest decent addressable LEDs available and they are fairly ubiquitous, which means you can find libraries to drive them for most microcontrollers. Which is good, because they have strange timing requirements.

    • A 20 Amp 5 Volt power supply. At full brightness each LED takes about 60 mA, and 0.06 * 300 = 18, which give me a bit of headroom. That’s about 90 watts to the LEDs, and these are pretty efficient, so yeah, that’s a lot of light. I had considered going with the strips that have 144 LEDs/meter, but they are a lot pricier and those would require 0.06 * 144 * 5 = 44 amps of power, which makes it less like a lighting project and more like a welding one.

    • A ESP8266 wireless microcontroller. These are really hard to beat; you get a microcontroller with a decent number of inputs and a full 802.11 wireless stack; it can function either as a wireless client that hooks up to your house system, or it can function as a hotspot on its own. And it’s cheap. I went with the Adafruit Huzzah because it comes on a nice board that can be driven by 5 volts, and because Adafruit doesn’t sell cheap stuff that breaks. And it’s still less than $10. Oh, and it uses the Arduino IDE.

    • A light sensor, so that I can use this as general lighting during the night. Sensor TBD.

    • A passive infrared sensor, so I can ramp the LEDs up to full brightness when somebody shows up. Sensor TBD.

    The hardware part is straightforward; it will just be a matter of getting all the parts and hooking them up. I haven’t settled on my mounting approach for the strip, but I think it will probably be 3/4″ electrical conduit, as it is very straight, very rigid, cheap, and has decent ways to mount it to walls. That also lets me twist it around to adjust the light.

    As for the software, that gets a little more interesting. The ESP will serve up a web page where you can choose your lighting scheme (all on, specific colors, a rainbox effect, etc.), and I’m planning on coding that directly in HTML since I didn’t like any of the libraries that I found. For the LEDs, I’m taking a different approach.

    The existing libraries are written to run on Arduinos, which have very little memory, so you need to be very small and optimal. That leads to code that looks like this:


    // Input a value 0 to 255 to get a color value.
    // The colours are a transition r – g – b – back to r.
    static uint32_t Wheel(Adafruit_NeoPixel& strip, byte WheelPos) {
       WheelPos = 255 – WheelPos;
       if(WheelPos < 85) {
         return strip.Color(255 – WheelPos * 3, 0, WheelPos * 3);
       }
       if(WheelPos < 170) {
         WheelPos -= 85;
         return strip.Color(0, WheelPos * 3, 255 – WheelPos * 3);
       }
       WheelPos -= 170;
       return strip.Color(WheelPos * 3, 255 – WheelPos * 3, 0);
    }


    static void Rainbow(Adafruit_NeoPixel& strip, uint8_t wait) {
       uint16_t i, j;


      for(j=0; j<256; j++) {
         for(i=0; i<strip.numPixels(); i++) {
           strip.setPixelColor(i, Wheel(strip, (i+j) & 255));
         }
         strip.show();
         delay(wait);
       }

    Honestly, that is just awful; the animation is written right at the metal, and this approach doesn’t integrate well into the ESP because the web server can’t handle any requests while we are stuck in one of these loops. Luckily, the ESP has a lot more memory than the Arduino, and I can afford to spend that on some much-needed software abstractions. So, using the skills I apply at work when I’m writing C# I asked myself, “Self, what sort of library would I build if I had a bit of memory to spare?”. And this is what I came up with:

    A Chunk is a series of RGB pixels that acts as a pixel source. Let’s assume that it has three pixels and is set to “Red Green Blue”.

    A Mapper knows how to map a chunk onto the RGB strip. It is pretty simple; it just does the following:

    for (int i = 0; I < strip.numPixels(); i++)
    {
        strip.setPixel(i, chunk.getNextPixel);
    }

    The Mapper maps the chunk onto the strip until the end of the strip, so if our strip had 9 pixels, it would end up with “Red Green Blue Red Green Blue Red Green Blue”.

    That gives me a simple static mapping, but chunk has one more feature; you can set the offset at which it will start sourcing pixels. So, if I write something like:

    for (int offset = 0; offset < chunk.numPixels(); offset++)
    {
        chunk.setOffset(offset);
        mapper.renderAndShow(chunk);
    }

    That gives me a chaser feature; every time through the loop, the chunk shifts one spot to the right, and the chunk wraps around.

    I can also use this with chunks that are larger than the strip, and animate the offset back and forth to control the portion of the chunk that is shown.

    The Blender class is used to create a chunk that blends two colors together; pass it the first color, the second color, and the number of steps for the blend, and it generates a chunk that implements the blend.

    The following code generates a 180-pixel blend across 6 colors:

    RGBColor red(255, 0, 0);
    RGBColor yellow(255, 255, 0);
    RGBColor green(0, 255, 0);
    RGBColor cyan(0, 255, 255);
    RGBColor blue(0, 0, 255);
    RGBColor magenta(255, 0, 255);


    Blender blender(180);
    blender.addBlend(red, yellow, 30);
    blender.addBlend(yellow, green, 30);
    blender.addBlend(green, cyan, 30);
    blender.addBlend(cyan, blue, 30);
    blender.addBlend(blue, magenta, 30);
    blender.addBlend(magenta, red, 30);


    pChunk = blender.getChunk();

    It is much much much easier to understand than the code I started with, and very easy to modify.

    And finally, there is an Animator class that makes it easy to drive all of these from the loop() method. Give it a minimum and maximum offset, how often to modify the offset (so you can do slow animations), and the increment to add to the offset, and then just call run() every loop and it will handle the animation for you.

    I’m pretty pleased with the current implementation, but it’s not quite good enough to easily implement a Larson Scanner, which is a definite requirement. I think I can do it with two chunks that are a lot bigger than the strip, but it would be inefficient. Perhaps if the chunks were sparse, with blank spaces at each end.


    Pages:1...9101112131415...35