Monthly Archives: February 2015

Decoding Pinball Bus Signals Part 3

A trip to Vetco yield three 34-pin IDC connectors and some ribbon cable. I built a nice & short cable, hooked it up, and the lights worked normally. So that is good.

The signals from the logic analyzer looked a little better, and I was able to make some measurements.

All the pulses are negative, which is expected because TTL is much better at sinking current than sourcing current.

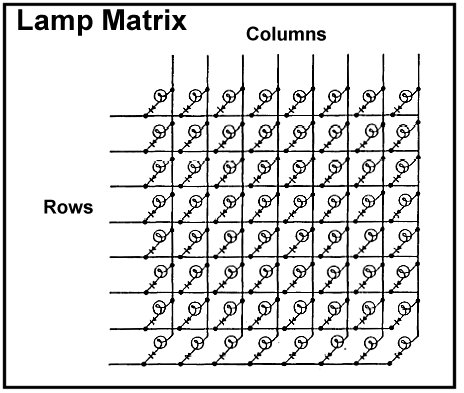
The pulse width is 360nS. If that is one clock-tick wide, that means things are running at 2.78 MHz, which is pretty much as expected. The delay between the row/column strobes is about 2mS.

Let’s do some math:

At 16 MHz, the clock cycle time is 62.5 nS, which means I would have less than 6 clock cycles to respond to the interrupt and read the data values. My online reading has showed that the AVR needs at least 8 cycles just to *start* executing my interrupt vector, which means using interrupts to read the data directly isn’t going to work.

At which point we step back and analyze the options.

  1. Go with a different microcontroller. An arm-based solution running at 100+ MHz would probably work.
  2. They make buffer chips for a reason – just use them, and things will be great.
  3. Use polling

#1 sounds more complicated than I want to get right now. #2 would obviously work, at the cost of some additional external circuitry. My first reaction to #3 is “yuck yuck yuck”, because polling is rarely a clean solution, and it would probably be a bitch to get my logic plus I2C/ USB to work at the same time as polling. However, if I was willing to burn an extra AVR, I could probably build the bus-reading part in one and then use another one for the process & communication. Still yuck.

So, it looks like buffer chips are the simplest part. The driver board uses a 74LS374, which is an octal D-type positive edge-triggered flip-flop. When the clock signal goes from low->high (ie at the end of the strobe pulse), it grabs the current values on the inputs and saves them into the outputs, which could be read at our leisure.

So, just put one of these in-line with the data, hook it up to the strobe, grab an interrupt from the strobe, and then the data will be ready and waiting when we need it, right?

Well, that will work, but I need to get both row and column data out. If I use two buffers, that uses 16 input pins, plus two for the strobe interrupts, plus two for communication, which means 20 pins total. Which is precisely the number of pins on an arduino, so it will work, but with with no room for bells and whistles, which I much confess a certain fondness for.

If I come up with a way to combine the strobes, I can use a single buffer chip. What I want sounds like an OR operation, but remembering that the strobes trigger negative and spending a few moments with truth tables, it turns out what I really want is an AND; it will be high when both inputs are high, and will go low when either input is low.

And… that’s not going to problematic. The flip-flop is triggered on the rising edge which is right at the end of of the pulse. If we put a gate in front of it, we add a propagation delay of something like 20-50 nS, and we might miss the data.

Is there an alternative? Well, yes, there is. The 374 has an output enable input. Pull it low, and the chip will drive the outputs. Drive it high, and it disconnects the outputs. That will let us parallel two of the 374s and enable the one that we want from the Arduino. Works, but that is going to be a whole bunch of data lines and is going to make the circuit board layout interesting.

So, that’s where I am right now, but I’ve asked a few people if there are better alternatives.

There were a number of different faster microcontroller suggestions. There are a few that look workable – and I am professional at software and amateur at hardware – but I’m not excited about spinning up on a whole new toolchain.

On the hardware side, it turns out there are some better choices. A couple people suggested a 74HC165 as a nice choice, as it lets you read the data out serially. Slower, but with 7 less lines and the PCB routing in my head was already getting pretty bad. But… that chip both clocks in and clocks out on a master clock, which doesn’t work for what I need.

Enter the 74HC595, which has separate clocks for the store and read operations. It’s a tiny bit inconvenient in that it’s modal – you have to control whether it’s in “load in parallel on load clock” and “read out serially on read clock”, but it’s still simpler. I can only find it in SOIC, so I ordered some adapters from adafruit to go along with it. That, and some nice connectors for the ribbon cable. BTW, that thing that you put on the end of a ribbon cable is not called a “connector”, it’s called a “female header”. I have the usual digikey exasperation until I figured that out.

When that all shows up, I can breadboard the hardware, and then start on the software. The matrix decoding seems pretty straightforward to implement, but dealing with flashing lights looks to be challenging. While I could just send out a state change whenever a light turns on or off, it would be more convenient if I could just say that a specific light was on, off, or flashing. I have to do flash detection somewhere because I need to detect the difference between flashing and on for some things I want to do.


Decoding Pinball Bus Signals Part 2

The connection from the CPU board to the driver board uses 34 pins, in a standard 17×2 format. In the machine, it’s connected together by a short (4” or so) ribbon cable withi IDC (insulation displacement) connectors. If you were around when IDE drives were common, you’ve dealt with these connectors.

Look through my old stuff, I couldn’t find any cables that had 34 pins, but I did find an old 40-pin IDE drive cable with 3 connectors. I taped off one end the connectors, looked carefully at the schematics for the board, and wired up the logic analyzer to the third connector.

Then is was a simple matter to unlock the pin, remove the backglass, pull off the existing connector, and hook up the new cables. Turn on the pin, it boots up fine, and… none of the lights work. turn it off, pull the cable, replug it, turn it on, no lights. Put the factory cable back on, things work fine. My cable, no lights.

Not really sure why it didn’t work, but I was able to get a signal off of the analyzer. Sort of…

Hmm. What do we have?

Well, let’s start with the good news at the bottom. Channels 8 and 9 are the row and column strobes, and they are putting out nice signals, ones that should be easy to grab with the Arduino.

Channels 0-7 are supposed to be the data. What we see are really thin pulses (they do have some width to them, but not much) on some of the channels, and nothing on the rest of them. What’s going on? Well, I’d like to stress that I don’t know. What I do know is that the boards are built using TTL logic, and TTL inputs have a relatively low impedance, which limits the number of inputs you can drive with a single output (this is known as “fan out”). The data lines that I’m trying to read go to multiple boards, so my guess – well, actually, it’s more of a hope than a guess – is that the load of the analyzer plus not having the lines well terminated is causing the issue.

So, it’s off to Vetco to pick up some real 34-pin connectors and ribbon cable. I’ll make up a nice short cable, and we can see how that works with the analyzer.

If that doesn’t work, we’ll try the Arduino directly, which has nice high-impedance inputs, so it should put minimal load on the bus.


Fixing your cyclist and programmer back…

If you have a desk job, you spend a lot of time, sitting. This is bad for your back, and if you’re a cyclist, it isn’t helping you. If your back hurts, this is the post for you.

I’ve spend the last 6 months or so working on mine, and I thought I’d share what I’ve been doing. Note that this can help your cycling as well.

First off, you’ll want to fix your hip alignment. Most people have either an anterior or posterior pelvic tilt. This is the best article that I’ve found that talks about it and tells you which muscles you need to stretch and which ones you need to strengthen. My PT helped me with it but this article gave me a lot of backing. I had a fairly serious anterior pelvic tilt (also known as “hyperlordosis”).

I would also recommend reading this and this.

My recommendation is to start with those exercises and do them for at least a few weeks before you go any farther. You will have to find which ones work for you and which ones you can tolerate without pain.

Now, on to the back. This is about both posture and strengthening; cycling puts us the “arms forward / rounded” posture. There is some information in the articles I already listed, but here are a few other things that worked for me:

· Pectoral muscle stretches. Working on these every day makes a significant difference at keeping my shoulders back.

· Farmer’s walk. In this exercise, you have a weight in each hand, and you walk around. While you are doing this, you should hold your should back and your shoulder blades together. This is a great exercise. I recommend starting with something like 25 lbs in each hand (I use weight plates).

· Suitcase carry. Like the farmer’s walk, but harder because it’s asymmetric. Same style cues; keep the shoulders back.

On to the deadlift. I’ve come to believe that big functional motions like the deadlift are very useful, but you need to have good form and start slowly. I like the stronglifts 5×5 approach, and I recommend that, regardless of gender, you start out just using the bar. If your gym is good, it will have what are called “bumper plates”; they are round plates that are the size of 45s but are much lighter (generally 5lbs or 10lbs is the smallest size). You use these so that the bar is at the same height regardless of how much weight you use.

The best video I know of is “How to deadlift”. The big cue is to pull yourself down to the bar; this flattens your back and puts you in a good position.

Other stuff to do:

  • I try to get to a circuit training class once a week. They typically have a variety of core & strength moves.
  • I’ve also used Cyclo-Zen in the past; it has some good back and core workouts.

Decoding Pinball Bus Signals…

I have a project in mind for my Twilight Zone, the exact details of which I will reveal later.

To implement the project, I need to detect when specific lights are lit in the machine. I thought of a couple ways of doing it. I could put a light sensor underneath the playfield or I could hook up to the wires that power the lamp. Both are fairly straightforward to do, but they are a bit inelegant, and I’m in the mood do to something more elegant.

So… What if we could read the signals that the CPU sends to the driver board? We could figure out whether any of the lamps is lit with a single connection to the system?

Okay, so, what would that take?

Well, the Twilight Zone uses the WPC architecture, and is driven by a 6809 running at 2 MHz. I don’t know if that’s the bus speed and am too lazy right now to find out, but I’m hoping that I can do what I need with an arduino running at 16 MHz.  What do I need to do? Well, that requires a bit of a journey…

The lamp matrix

Pinball machines have a lot of light bulbs, and running an individual wire would be expensive. So, instead of running separate wires, machines use a lamp matrix.

We have 8 rows, and 8 columns. To turn on a light, we drive the column to positive voltage and the row to ground, allowing current to flow. With a bit of code, we can drive them all. Basically, the code looks like this:

  1. Drive all columns low.
  2. Drive the rows that we want to light in the first column low.
  3. Drive the first column high
  4. Wait, and then repeat steps 1-3 with each additional column.

Digging into my WPC Schematic manual, we find some nice designs about the row and column drivers. What we are interested in is the method that is used to pass the row and column information to the driver board. It turns out it’s pretty simple:

  • Both the rows and the columns have a 74LS344 latch connected between the CPU bus and the row/column driver electronics.
  • The latches are clocked (ie data is loaded into them) when a line (ROW_STROBE or COL_STROBE) from the CPU is driven high.

So, in concept, what the microcontroller needs to do is pretty simple. First off, we need external interrupts defined and hooked to ROW_STROBE and COLUMN_STROBE. When either of the interrupts fire, we need to quickly grab the value from the data bus. From that, we can tell which lamp is in which state, and pass that information on. I would also like to detect flashing lights, which will require a bit more code.

I bought a small logic analyzer from Seed Studio so that I can eavesdrop on the bus and see what is really going on. That will probably be the subject of the next post.