Browsing posts in: Holiday Lights

WS2811 expander part 4: Boards and Parts!

After a bit of waiting, the boards showed up from OSHPark. they looked fine as far as I could tell.

I had all the other parts to do a board, but I needed a paste stencil. I went into pcbnew, chose File->Export, and then chose to export the F.Mask (ie solder mask) layer to a SVG. I cleaned it up a bit to remove non-pad elements, went out to the laser cutter and cut a stencil out of 4 mil mylar:

IMG_9495

Everything looked pretty good; there was good alignment between the board and the stencil. The spacing between the pads looked a little tight, but it’s a fairly fine pitched board, so it was mostly what I expected.

I carefully aligned the stencil and taped it on, got the solder paste out of the fridge, and applied it. Pulled up the stencil and it looked crappy, scraped it off, did it again, and got something that looked serviceable though there was more paste than I expected. Hmm.

Got out the components:

  • 1 WS2811
  • 1 33 ohm resistor
  • 1 2.7k ohm resistor
  • 6 10k ohm resistors
  • 3 1k ohm resistors
  • 3 NPN transistors
  • 3 MOSFETS
  • 1 100nF capacitor

and it took about 5 minutes to do the placement. Here’s the result:

IMG_9496

I didn’t look at the picture at the time, but that’s a *lot* of solder paste.

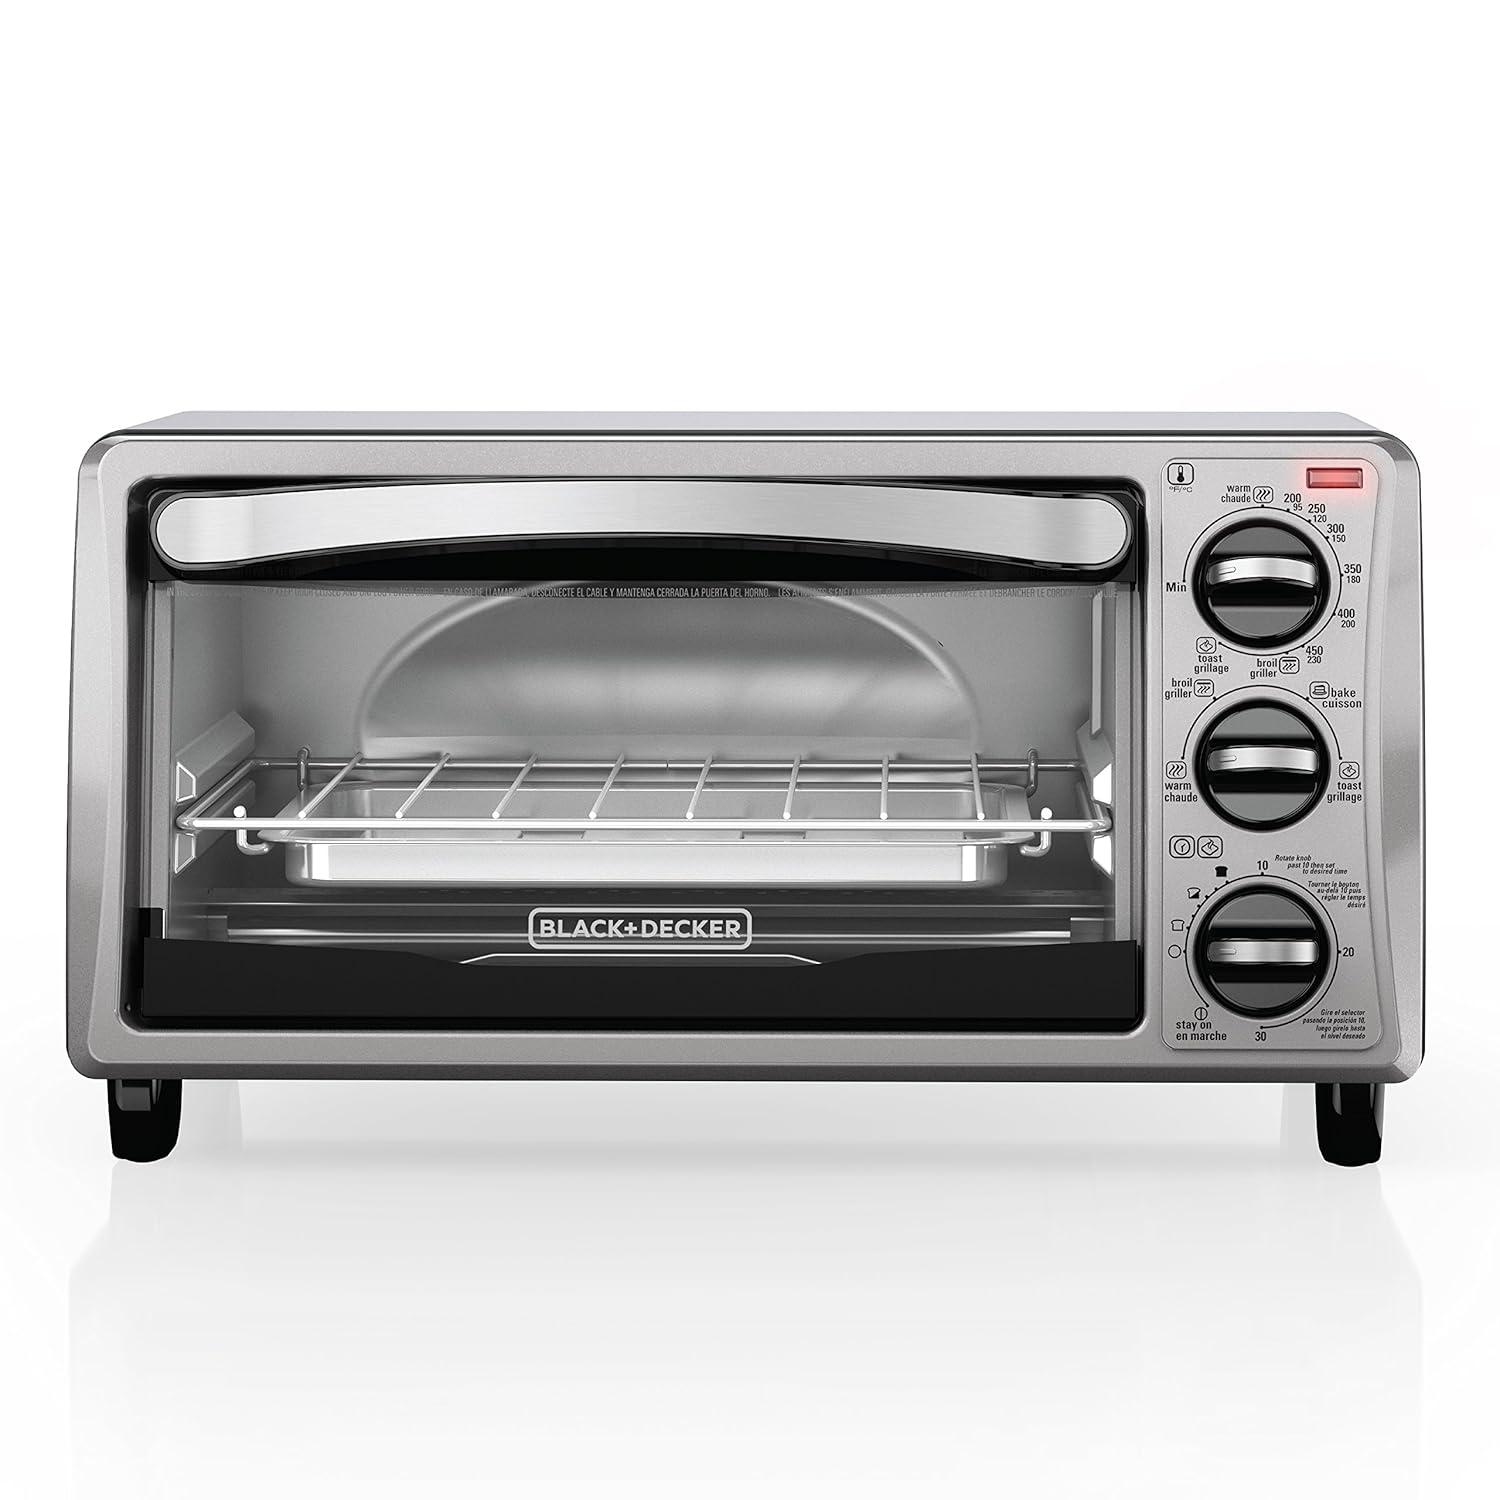
Into my reflow oven (Controleo 3 driving a B&D toaster oven), let it cycle, seemed fine, here’s the board:

IMG_9499

Not my best work. Frankly, it’s a mess; there are obvious places where there is no solder, and obvious pins that are bridged together. I spent about 15 minutes with my VOM testing for continuity and there were 3 solder bridges and 7 unconnected section.

Something clearly went wrong. And I went back to PCBNew and it was *really* obvious.

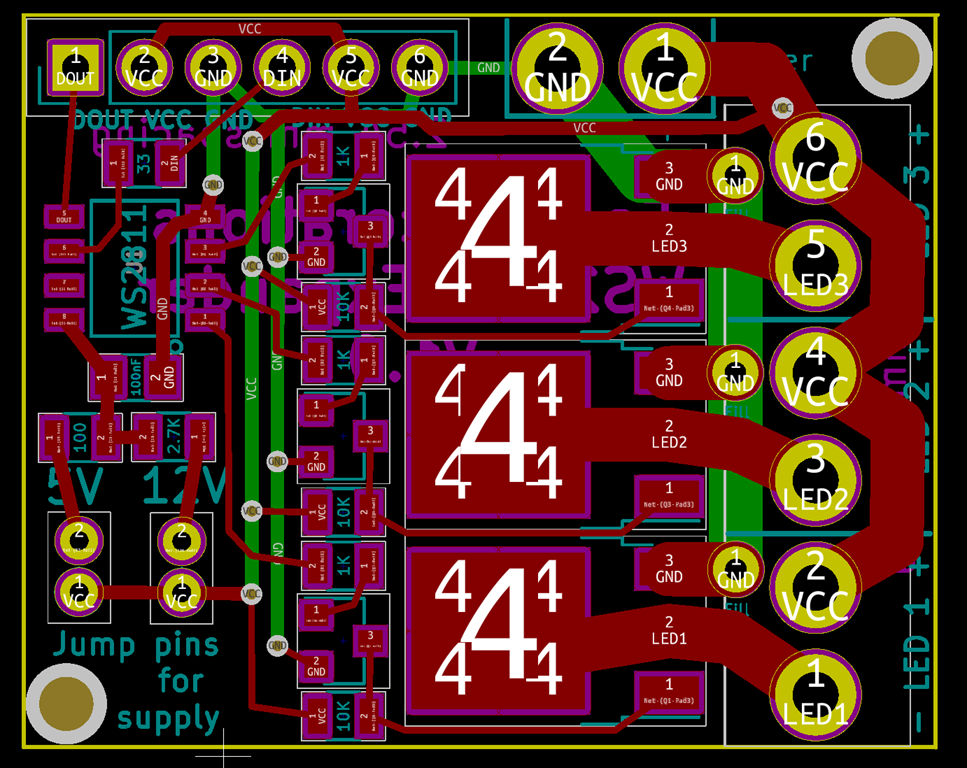
The layer you should choose for your stencil is F.Paste, not F.Mask. Here are the two next to each other (Mask left, Paste right):

imageimage

The Mask layer sizes are positively giant compared to the paste ones. So, what happens if you use the Mask layer is that you have:

  • A *lot* more paste on the board, especially the small pads which must have double the amount
  • Solder paste with much reduced clearances.

What that means in reality is that when you put the components on, it squishes the solder paste together and connects pads that shouldn’t be connect. And then when you head it up, you either get bridges or one of the pads wins and sucks all the paste away from the other pad (how it wins isn’t clear, but it is clear that the huge MOSFET pads pulled all of the paste from the transistors next door).

This makes me feel stupid, but it is actually quite good news; it means that the design is fine and I just need to remake a stencil with the correct layer.

Anyway, after a lot more rework than I had expected, I ended up with this:

IMG_9500

It’s still an ugly board, but does it work?

Well, I hooked up 5V, GND, and data in to one of my test rigs and a LED to the LED outputs.

And it works; the LED is on when I expect it to be on and off when I expect it to be off. All three outputs are fine.

The next test will be some testing to see how it fares with switching high current. And I’ll probably want to make another one using the correct stencil and hook it up for 12V operation to verify that.


New kit: LED Candy Cane part 1

My first kit – the Dodecahedral Light Engine – has been selling about as well as I expected a very hard to construct project with limited usages to sell, which is not very well. I primarily did it because I was going to do them anyway for my decoration project and wanted a project I could learn on.

I’ve just started working on my second kit, which is going to be a lot easier to build, cheaper, and more widely useful.

One of my favorite displays is a “tree of lights”, which is a tree with custom LED ornaments on it:

The ornaments are made of small sheets of plexiglass with high-power LEDs inserted into the holes, wired up, and waterproofed.

They are really bright; note in the photo that all of the dim lights are normal brightness LEDs, and even at that level the ornaments overpower the camera sensor. They are bright enough that – and I am not making this up – they cast a shadow about 50 feet away when they were at full brightness, so I dialed them back a little in brightness.

These ones are driven directly from 120VAC as that is what the controller provides.

What I want from this project.

  1. A fun, easy-to-assembly ornament
  2. The ability to run off of 5V or 12V (*maybe* 120VAC with a big disclaimer that you shouldn’t really do it)
  3. Tunable brightness
  4. The ability to drive them as WS2811 nodes (see my WS2811 expander posts…)
  5. A frame/armature that is easy to produce automatically (the originals were done with a 5mm end mill in a drill press and took a *long* time).


WS2811 expander part 3: PCB Revisions again…

More revisions.

I posted the design to /r/PrintedCircuitBoard, and of the comments said:

“Do you need pullups on the outputs of WS2811?”

And of course, I was confident the answer was “no”. For about 5 seconds. And then I measured the WS2811 I have in my breadboard; it gave a nice solid sink when it was on, and when it was off, just a fraction of a volt. Clearly not up to sourcing current to the NPN transistor.

The most likely explanation is that it’s an open collector output:

The collector on the output transistor is just left hanging – it’s only collected to the external pin. The voltage on an open collector can float up above the internal voltage of the IC as long as you don’t exceed the maximum voltage of the transistor

Open collectors are really useful if you want to have a bus architecture with multiple components able to pull the bus low, or if you aren’t sure what voltage of the output is going to be. Since the WS2811 can be used to drive LEDs tied to either 5V or 12V, it makes perfect sense. And it is confirmed by the internets.

Which means that the circuit needs to get a tiny bit more complicated:

image

Another pullup resistor is added to the mix. Really not a problem from the cost and assembly perspective as the design goes from 9 resistors to 12 resistors.

But, can I fit it in the current board layout without making it bigger?

I should probably add a parenthetical note here that says it’s often easier to go with a bigger layout, and in fact if you are going to hand solder a board, you *should* go with a bigger layout. Though I’m not sure how practical it is to solder the MOSFETS by hand since the base pad is so big…

Anyway, here’s what the board looked like before:

I need to put a resistor between each of the traces that head from the WS2811 over to the transistors. Hmm.

I initially just tried to fit them in there, and with a big of rerouting, I was able to make it fit. Technically.

Then I decided that it would be a lot easier if I moved the vertical ground trace underneath the transistors and used that to provide the ground connection to the transistors. That meant I could move the VCC vias around more easily, and could do the following:

image

The fit in reasonably well.

I *think* it’s ready to order the first version of the board, but there’s one more step. I now have on hand the WS2811 ICs and both kinds of transistors. So, I printed out a design with the copper layers shown, and did a test to see if the components really fit on the board.

image

That shows the WS2811 on the left, the MOSFET on the right, one of the NPN transistors and then a tiny 0805 10K resistor at the top. Everything looks like it will fit fine.

I ordered 3 boards for $7.10 from Oshpark, which is my usual supplier for prototype boards if they are small.


DLE (Globes of Fire) Part 5 – First Board!

When a new telescope is completed, one of the big milestones is known as “first light” – the first time that the telescope is used as it is intended.

Now that I am the proud owner of a reflow oven – a modified Black & Decker toaster oven fitted with Whizoo’s Controleo3 reflow oven kit – and I have a new version of my boards back – it’s time to think about how to build these things in a reasonable way.

The plan is obviously to switch from hand-soldering to reflow. To do that, the first thing that I need is a stencil that I can use to apply solder paste. Thankfully, kicad makes this really easy; you can modify the solder pad tolerances in the program, and the pcb editor can write out SVG files (thanks to Rheingold Heavy for this post). If I have the pads, I can easily cut a stencil, likely out of mylar because it’s a bit cheaper than Kapton is.

That would give me a way to do a single board if I could hand-align it closely enough. But each of the globes needs 12 of these boards, and hand-aligning is a pain.

So… what my real plan to do is to cut holes in a piece of hardboard (or cardboard) that will hold a number of the boards (12 or 24) and then a matching stencil. If I align the stencil one, then I can put solder paste on all of them.

IMG_9223

So, here’s the test. I took the pad svg and the board edge svg, joined them in inkscape and then cut them on the glowforge. As you can see, the boards fit perfectly into the cutouts, and the solder pads cut correctly. Next I will need to do a better version of this, with different colors for the pads and board edge so I can turn them off and off when laser cutting. I’m also probably going to cut holes for some posts that will give me registration between the board with cutouts and the stencil.

You can also see the first two boards that ran through the reflow oven. I did the solder paste without a stencil and I also skipped baking the LEDs since they showed up in a factory-sealed pack and have been sealed since, and both boards came out fine. And a 10 minute reflow cycle is a lot quicker than hand soldering…


Provisioning and using the ESP8266 controller

The ESP8266 controller is preprogrammed with the ability to connect to your local wifi network and be remotely controlled.

Provisioning

Initially, the controller does not know how to connect to your network, so it sets up its own network. Here is how to set it up:

  • Using your phone/laptop/tablet, connect to the network named something like “EDP_1002170403”. The password is the same as name of the node.
  • One you are connected, open up your browser and navigate to http://192.168.4.1. That should enter the provisioning page. Enter the SSID of your wireless network and the password, and click on connect.
  • If everything is working correctly, that will connect to your wireless network. You can find out the IP address by looking for the “EDP_…” name in your browser’s host table, or you can hook the esp board up to your computer and watch what it writes out the serial port when it boots.
  • Controlling via http

    You can control the LEDs via http by sending textual commands to controller. The format looks like this:

    http://[ip address]/message?content=[message]

    Controlling vs UDP

    If you want realtime control of the LEDs, http may have too much latency, which may result in unexpected pauses. The controller also supports communicating through UDP.

    To connect via UDP, use the same IP address and pass commands directly. The internal controller code runs at 100 Hz; if you drive with UDP messages at 60 Hz everything should just work great.

    Supported Messages

    All commands are three letters long, followed by another character (the examples use an underscore (“_”), followed by numeric parameters.

    The following commands are supported:

    Alternate

    Alternate between two colors.

    alt_r1,g1,b1,r2,g2,b2,time

    r1, g1, b1: the rgb values (0,255) for the first color (0-255)
    r2, b2, b2: the rgb values for the second color
    time: the time for each color

    Example: alt_0,100,000,000,000,000,250

    Blend to

    Blend from the current color to a specified color

    rgb_r,g,b,time

    r, g, b: the rgb values (0,255) for the new color
    time: the time for the blend

    Example: rgb_255,255,255,1000

    Color rotate

    Rotate through a bunch of different colors.

    col_speed,brightness

    speed: the speed of the rotate
    brightness: The brightness of the colors

    Example: col_5000,200

    Flash decay

    fdc_decay,min,max

    decay: the speed of the decay
    min: the minimum pause before the next flash
    max: the maximum pause before the next flash

    Example: fdcx250,10,500

    Full control

    Full control is used to control the color of all the leds directly.

    ind_chunk,data-bytes

    chunk: the number of leds to apply each set of data to.
    data-bytes: colors express as two digit HEX values in the format RRGGBB

    Example: ind_011,000044440000004400

    Each color in data-bytes will apply to 11 LEDs. The data-bytes contain 3 color values:

    000044 – a blue value
    440000 – a red value
    000044 – a green value

    Save

    Save the current animation so that it will use that animation when rebooting.

    s

    Set pixel count

    Set the number of pixels that the controller will use. This will result in a reboot of the controller.

    n_count

    count: the number of pixels

    Example: n_13


    DLE (Globes of Fire) Part 4

    It’s been very long since my last update, and a fair bit has happened.

    Hardware:

    I did a rev 1.2 of the board and sent them off to allpcb for a small run (10 IIRC, so 120 of the LED boards and 15 of the end boards).

    The boards showed up quickly, and didn’t work. Well, two of the LEDs worked sometimes, but the third would not.

    Clever me, I did some led moving and I managed to route the VCC line for LED #2 right across the data out pad when I did some moving. I could break the pad by hand and get them to work, which through trying to be quick led me creating a circuit that would work for all the colors except white because I didn’t break the trace completely. Which led me to think a new real of LEDs was bad and waste a couple of days trying to track down what was going on.

    I took the opportunity to do rev 1.3:

    image

    I bumped the VCC and ground tracks up in size, redid the VCC routing, and just generally cleaned things up to be nicer. I also added (finally) a 100 nF decoupling capacitor to the right of the #1 LED, which should help eliminate glitches in the future.

    I spun a small verification order (3) through OSHPark because it was only $5, and those worked great. After that, I pulled out my little list of material costs, went back to reprice the PCBs, and found that JLCPCB would do my full first order for $83 delivered, which was about 30% less than the $120 I had written down. Given the temporary nature of PCB special deals, I put that order in, and today found this on my doorstep:

    IMG_9215

    Well, technically they were in a *box* on my front porch. That is 600 of the LED facets in the two bags at the top and 50 of the top facet in the small box. And the two pretty purple boards are the test ones from OSHPark.

    Assembly

    I’ve gotten pretty good at soldering the LEDs on the facets, but my plan all along was to reflow them. Towards that, I picked up a few things:

    That’s a nice little Black & Decker TO1313SBD toaster oven.

    And:

    That’s a Controleo3 toaster oven conversion kit. We’re going to hot-rod that oven, adding a full computer control to it (the blue board on the left), add an extra heating element, a lot of insulation, and even a servo to open the door.

    All of this will give me a reflow oven; you can put a board with solder paste and components on it, hit a button, and it will heat the board at a certain rate until the solder melts and then cool them down at an appropriate rate. It’s going to live under the garage near the laser cutter, and my guess is that I’m going to need a bit of ventilation for it.

    Firmware

    I am at what I think is the V1 firmware, for approximately the third time. This took a whole lot of time and effort, with the usual fun of running two different codebases on two microcontrollers connected over USB.

    Provisioning

    The first time setup for IoT devices can be a bit of a pain, as they have to get your wireless ssid and password. In playing around, I found that iOS doesn’t let you enumerate wireless networks or change connections programmatically, which meant it might be a real pain to set up multiple nodes by hand.

    Then, I had a small bit of insight, and realized that I already had a device that could easily enumerate all the wireless networks; the ESP can do that an I already had the code because I needed it for testing. It was merely a matter of grafting it onto the existing code.If you connect to the network for any node and give it an SSID and password, it will verify that it works and then pass it off to all of the other nodes so that they can auto-configure. That code is all done, and it’s pretty cool to watch because the current firmware shows the state of the connection by flashing. Okay, maybe that’s only a little cool.

    Animation

    I wrote a few of the simple animations that I want; some color rotations, a flash and decay animation, and a blend from the current color to a new one.

    I also wanted to be able to go fully to the metal and control every LED remotely and quickly. That led me to a better Http server for the ESP, a brief flirtation with TCP, and finally an implementation based on UDP. The server is fast enough that you could send the data for all 33 leds 500 times a second and it would work; it is currently constrained to 100 Hz because that is the speed the animation loop runs at, and I expect that for real applications sending data at 60 Hz would be fine.

    I am particularly happy with how the command processor worked out; the implementation is nice and clean.

    The wireless information is stored in permanent memory, and it is also possible to store the current animation so that it will resume on startup.

    Software (app)

    I want to have an app to control all of this. It needs to support both Android and iOS, which made Xamarin the logical choice; I can support both and I can write C# code which is a huge plus in my book.

    Like many open-sourcy software, it can be a real pain at times, but I’m able to build an app that deploys to my phone and debugs, and that’s a decent first step. I’m working on network discovery right now; once the provisioning is done, the app needs to enumerate all local ip addresses and see if one of my controllers is hiding there.

    And I’m using Xamarin Forms, which is built on top of XAML, which I guess is an advantage since I did XAML professional for a fair bit, but it’s a bit of a mind-bender as usual.

    I wanted to do something different for discovery, so I wrote a graphical pinger. Here’s a video.

    The app still needs a lot of work; it needs a way to do the initial provisioning, a way to list the different animations it can do, a color picker, etc.


    DLE (Globes of Fire) Part 3

     The new boards arrived from allpcb.com. To recap, this, time I went with standard 0.1” (2.54mm”) header pins between the boards. I ordered some angled headers from the Amazon to use for the connections.

    IMG_9061

    After I populated 11 faces with LEDs, it was time for assembly. Here’s the first approach:

    IMG_9063

    The first concept was to wire the faces together with short pieces of header on the back. This worked poorly; it took a long time to hook them up and the angles were rarely right. The first half was technically done, but I was unhappy.

    For the second half – and keeping in mind that prettiness was not a requirement – I decided to go with another approach. I would use angled headers on the outside, and just solder the pins together where they overlapped.

    But first, I needed a better way to set the angle. The led to the following design in TinkerCAD:

    image

    And then a long session of setup to migrate my 3D printer from an absolutely ancient laptop to one that was merely old. I printed up a whole set of these, and then used them to hold the faces at the right angle for soldering. That resulted in this upper ring:

    IMG_9068

    The alignment clips on the right worked very well; it only took about 30 minutes to do this whole ring. And yes, it’s very ugly.

    Time to hook them together, and then attach on the end face. These are attached with small pieces of header pin on the outside.

    IMG_9069

    Then it’s time to wire up the 5 volts, ground, and data, and take it out for a spin.

    The first attempt was not successful; one ring lit and the other didn’t. A quick check discovered that the ground connection between the two rings was not functioning, so I added an additional connection. Which led to this:

    IMG_9071

    The driver is running some simple rainbow code, so each LED is a slightly different color.

    Finally, adding on the requisite acrylic globe gives us the following:

    Globe of fire from Eric Gunnerson on Vimeo.

    Overall, I’m mostly happy. It would be nice if the header holes were a bit tighter on the pins, and I could clearly get by with 2mm or even 1.27mm pins. The 3d-printed alignment clips could use another iteration to make them easier to use.


    DLE (Globes of Fire) Pt 2

    A week or so goes by, and I get a package back from allpcb, so I started building one.

    Each half has a ring of 5 pentagons plus one the end, so I started hooking 5 boards together:

    IMG_9044

    The WS2812 LEDs are only 5mm on a side, so the whole board is roughly 15mm x 17mm. That’s tiny, and frankly working on it was a huge pain. I did this, put the boards into a box, and closed it.

    Then I came back the next day and decided to have another try. Rather than connect on the outside, I decided to use a much lighter wire and connect on the inside (back) of the boards. Here’s a set of 5 with VCC and GND hooked up:

    IMG_9046

    Yes, that’s some *ugly* soldering, but in my defense I’d like to note that the spacing on the holes is about 0.05”/1.3mm. This then gets folded into a ring. Eventually, we end up with the top and bottom:

    IMG_9050

    Next, those two are soldered together with wires to carry VCC and GND between halves, and you end up with this:

    IMG_9052

    Next was to wire through the data ports. Basically, it starts at one face at the open end, goes around that ring, goes around the lower ring, and finally travels to the bottom. Add in some hot glue to help hold things together, and put the LEDs on, and here’s the result:

    IMG_9053

    That is one ugly bit of construction, and it took a lot longer than I had hoped.

    IMG_9055

    After soldering a few hundred WS2812s, you learn how to do it without burning them up. On the left is one face from the 3-LED version that I tested to verify the layout.

    V1.1

    The first version was technically a success, but only because I so cussedly kept on. I was wondering if I could make something small enough to fit in an ornament ball, and the answer is “yes”, but you really don’t want to do it.

    So, it’s practically a failure.

    The biggest problem is the connection between the faces; the holes are too hard to solder, and using individually-cut wires is a pain…

    So, I’m going to abandon the single-LED version (kindof – more on that later) and work on the 3-LED version. I started by going with standard 0.1” (2.54mm) header spacing, and the plan is to use angled headers. The angled headers will stick out to the side, and two faces are connected by soldering the ends of the header pins together. It’s going to look a big weird, but should be a lot easier to construct.

    Here’s the old design and the new one:

    image

    Obviously, the big different is the connectors; they are much larger, though the overall design is only a big bigger. I’ve used the extra space to pull the LEDs a bit farther apart because trying to hand-solder the LEDs in the first version was a difficult. And I added a little bypass jumper; if you solder a wire (or better, a 0805 zero-ohm resistor) across those pads, you can omit the bottom two LEDs and things will work fine.

    If you read backwards, you might see that it says “Dodecahedral Light Engine” on the back, which is the new name for the boards.

    A fully-populated DLE will features 33 LEDs, pull 2 amps @ 5V with everything on white, and put out quite a bit of light.

    I need one more design review pass before I send this one out to have boards made.


    Globes of Fire!

    The parts for the new controller have started trickling in, but until they all show up I’m a stuck there, so I’ve been thinking in other areas.

    In the olden days – pre LED – I had a number of the 50 or 100 light globes in my display:

    See the source image

    I liked them for their intense burst of light, but the ones I had gradually died, and I haven’t found a replacement.

    So… I got thinking again about options. When I built my Animated Snowman, I used WS2182 leds on the faces of 3d-printed dodecahedra. It worked fine, but the hand-cabling was a pain:

    IMG_8435[1]

    Using the acrylic lamp globes worked great, however. They are cheap, easy to get, and fully waterproof. I just needed a better way to get the LEDs in place.

    One of the nice things about dodecahedra is that the faces are all pentagons. I remember a hack-a-day article a couple of years ago when somebody built one by soldering pc boards together, so I decided to do a design of that what that might look like:

    image

    The concept is that any face can hook to any face. You wire up the ground and VCC connections on all faces to give rigidity to the dodecahedron, and then wire up the DIN and DOUT connections from face to face in whatever pattern makes sense.

    This design gives me 12 LEDs (well probably 11, since the top or bottom one will be used for support) in the space of about an inch, so that would easily work in the small acrylic balls (6”, or 4” if I can get them).

    Of course, why do one LED per face when you can do 3:

    image

    Same concept as before; hook up DIN from another face, it will chain through all three LEDs and then head out through DOUT.

    This board is roughly an inch in size, so the resulting dodecahedron will be around 2” in size. That will give us 33 LEDs and live up to the title of the post, but it may be overkill, which is why I’m going two versions. I’ll drill a hole through the 12th face and use a threaded rod and nuts to mount the DLE (Dodecahedral Light Engine).

    I need to do some design cleanup and then send off for a run of these to see how they work.


    Snowflake–custom controller

    The Adafruit Huzzah was a nice starting point for the snowflake, but it’s both more expensive and not well-tuned for what I need. To drive the WS2812s, all I need is a single output, and I don’t need dedicated buttons on the board.

    I went back and forth on whether I wanted to do two controller boards – one that used the ESP8266 and another that used a cheaper AVR, but the ESP can be had so cheaply that it hardly seemed worth it. I considered a number of different ESP modules – or even building directly from the ESP8266 and adding flash, but the ESP-12 is pretty cheap and it has FCC certification (or is claimed to, at least).

    So, basically, I took the Huzzah design and looked at it in Eagle, and then pared off things that I didn’t need and did my design in KiCad. It currently lives here.

    The design is pretty minimal; it has a small 3.3 volt linear regulator to power the ESP (I used the same SPX3819 as on the Huzzah), appropriate resistors to put the ESP in the right state, diodes to handle level conversion between the 5V world and the 3.3V world and two headers. There’s a 6-pin programming header that has power, serial connections, and the reset and GPI00 pins on it, and there’s a three pin header for operation that has 5V and GND in to power the board and the data line out for the WS2812 string. Simple and straightforward. There will probably be another version with another sensor; I’m going to need a way to reset these things to handle wireless setup and my new design will be fully encapsulated, so I’ll probably do something magnetic.

    Here’s the schematic:

    image

    Once I had that, it was off to do the PC board layout. That is really my favorite part of the process; to go from a set of random components on the board to something functional (and perhaps even elegant) is a rewarding process. Here’s the layout.

    image

    I decided that I wanted both sets of connectors at the bottom and the ESP-12 at the top. Basically, the jacks are at the bottom, the 3.3V supply is in the middle, and the resistors, diodes, and LEDs are on the sides. All of the small components are 0805 sized, since I wanted something that I could hand-solder if necessary, and those will also reflow reasonably well if I want. Given the need for two jacks and the space they take up, there’s not a lot of margin in going smaller at this point.

    One of these times, I’m going to do snapshots of what it took to get to a decent layout.

    The PC boards got finished and sent out to AllPcb.com, who sent me 10 (actually, 11) copies of the board for a total of $5.49 with about a 7 day turnaround. I don’t understand the economics of how that can be profitable, but I’m not going to complain right now.

    Initial guesses at the overall costs for the controller:


    Part Price
    ESP-12 Module $1.78
    3819 regulator $0.06
    Other parts $0.11
    PC board $0.50
    Total $2.45

    No labor in there yet, but it’s just a matter of putting the parts on there and reflowing them. It should be pretty quick, and I’ll check to see what it would cost to outsource it as well.

    The boards have showed up, but I was too cheap to pay for fast shipping of the other components, so they’ll trickle in and then we’ll see if my design works.


    Pages:1234