
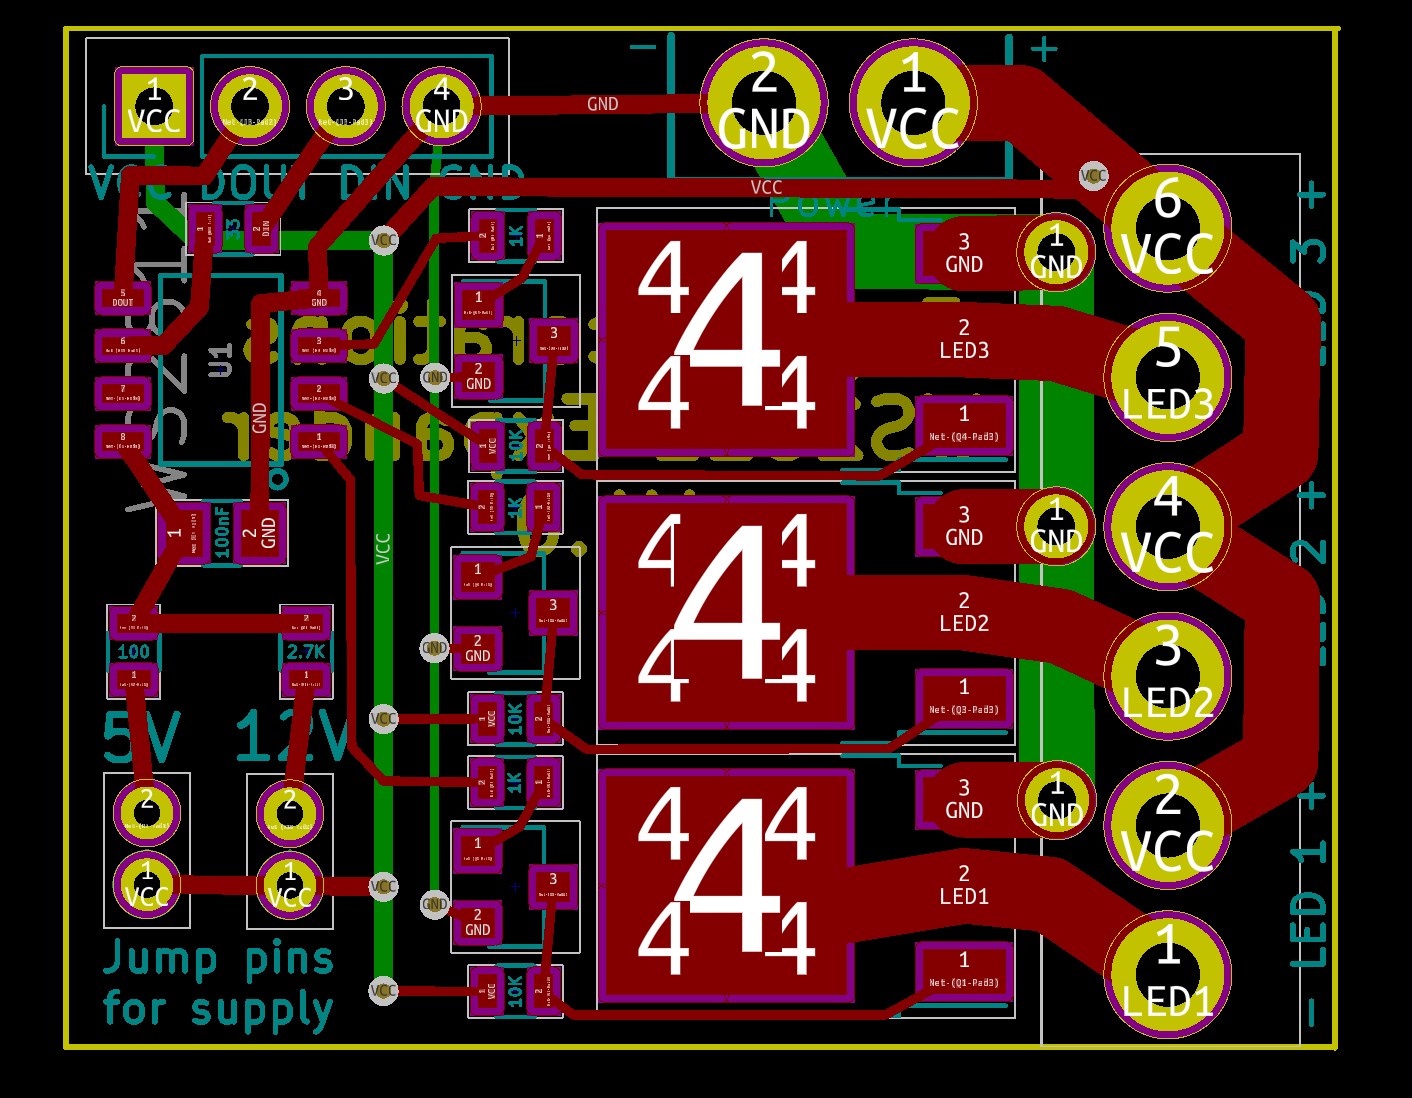
I’ve done quite a few improvements on the board. Let’s look at before and after:

My usual flow is to do some changes, and then load the board into OSHPark and see how it previews. And then make changes.
I’ve probably redone the majority of the traces on the board. The big changes are:
- I replaced the 0603 resistors with 0805. I’m going to do the components by hand, and the larger resistors are easier to place. And I have a set of 0805s sitting in my drawer.
- I realized that I hadn’t planned for chaining together more than one board. After 3 or four revisions, I settled on a single 1×6 header to hold both sections. You can either use two 1×3 headers or one 1×6.
- The big headers for power and the LED output were bigger but not a standard connector, since I just wanted them to be easier to solder to. That was stupid. They are now spaced to use standard 3.96 mm spacing (Molex KK line if you want branded stuff), so you can either solder or use a connector. This made the board just slightly taller.
- The transistors and resistors have been moved, aligned, spindled, and mutilated.
- Added holes for mounting, though it’s probably not needed with a board this small. But I had space.
- Added some more labels.
Updated schematic

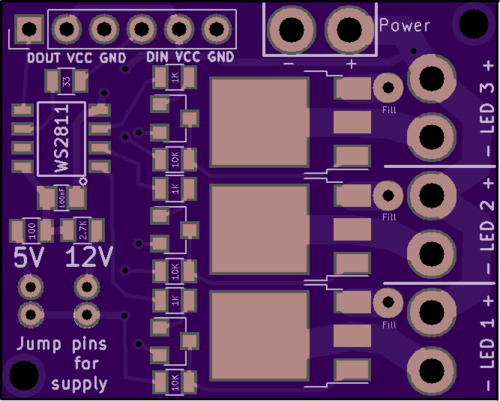
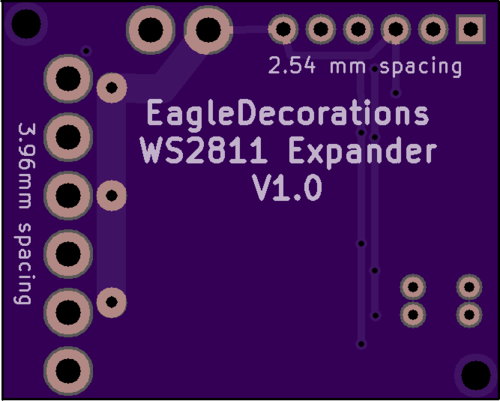
Board shots
I’m thinking this is probably good enough to get my prototype versions built.
project is very good.
pcb file is avalible for the public ?